Showing posts with label Ta 152C-0. Show all posts
Showing posts with label Ta 152C-0. Show all posts
Saturday, 2 August 2014
1/48 Hobby Boss Ta 152 C-0 - Part 5
Back to part 4.
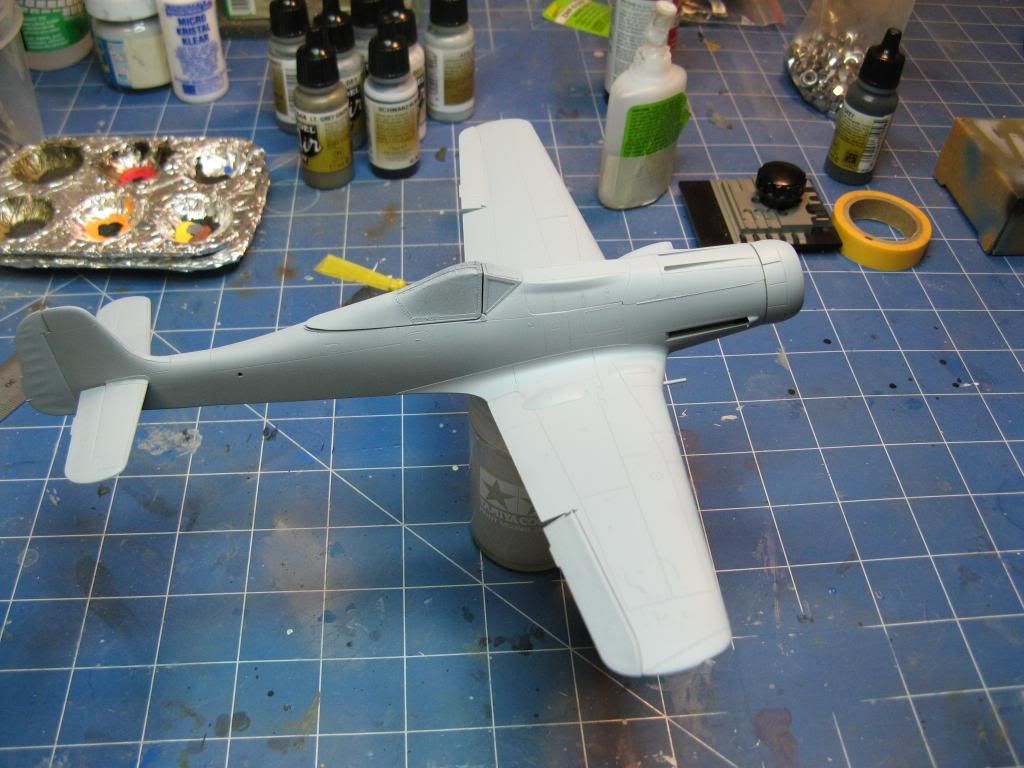
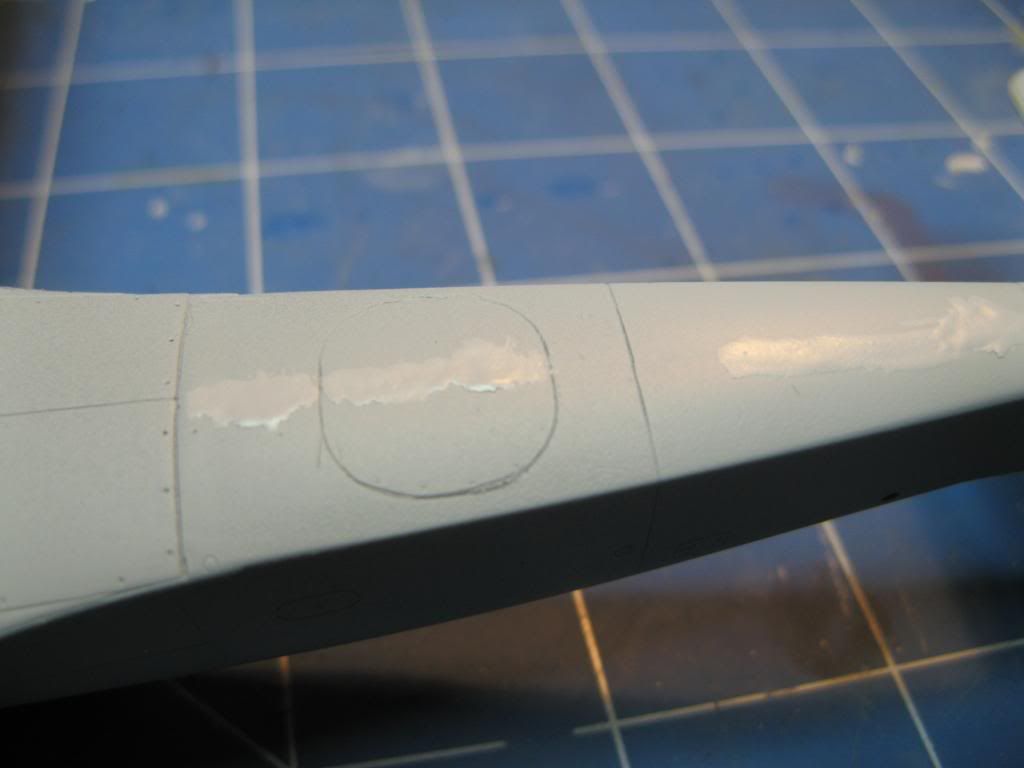
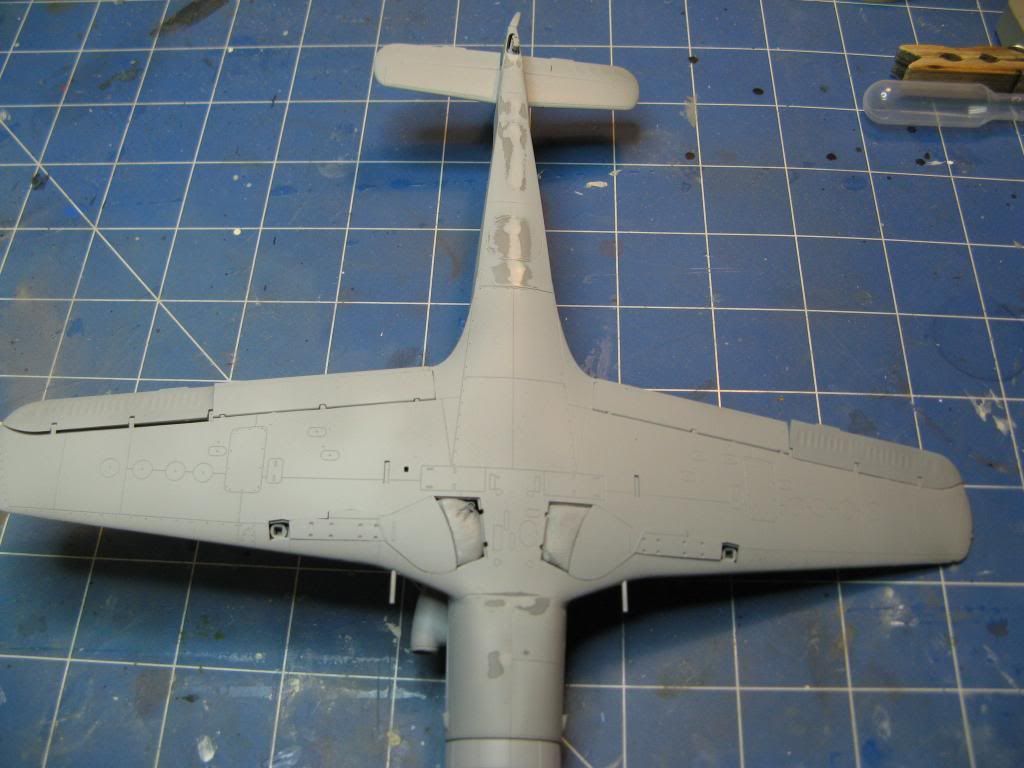
Once the primer was dry the model was inspected for any imperfections. The seam on the bottom was still faintly visible so a bit of Mr Surfacer was used to cover it up. This was then carefully sanded flush and re-primed.
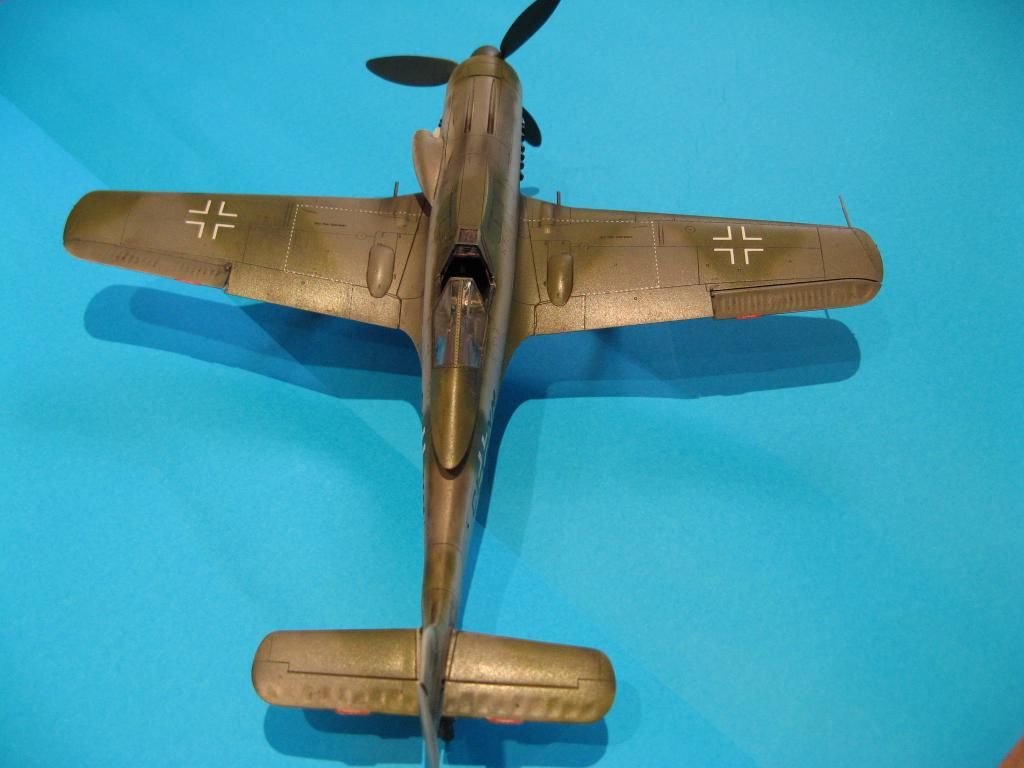
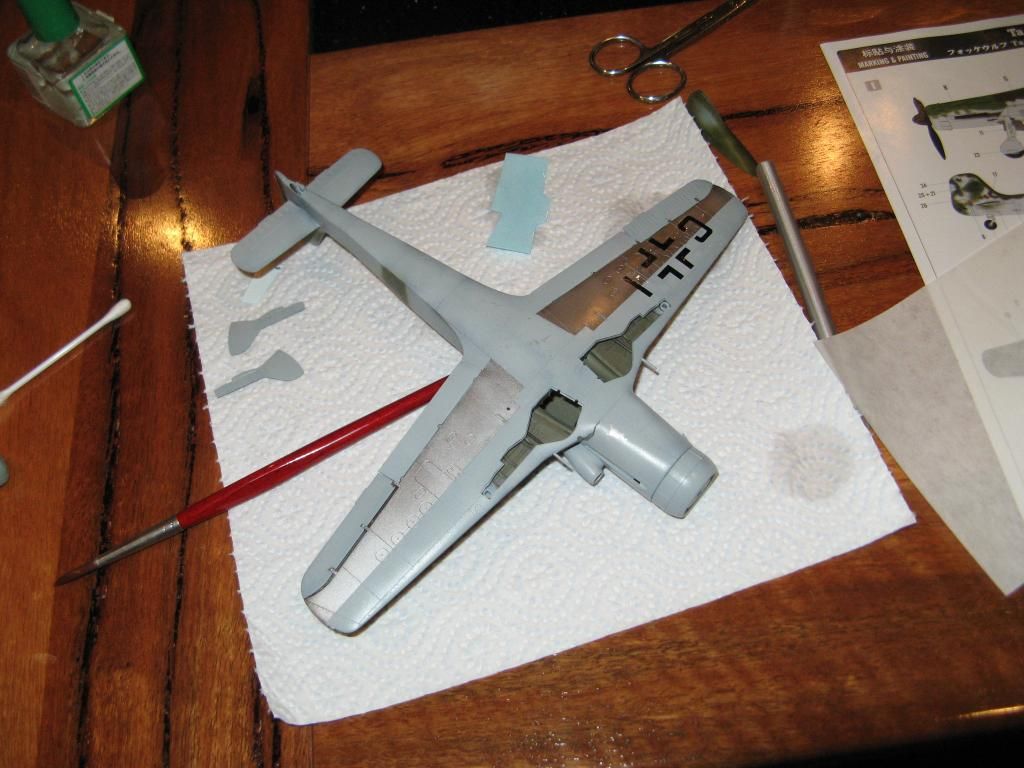
Here's where I got a bit lazy and didn't take too many photos. The model was given a preshade using Vallejo black along the panel lines. Then Alclad II metallic paints were used to paint the exposed metal areas under the wings. Two shade of aluminium were used to give a subtle contrast. This was then masked off and the main camouflage colours were sprayed. RLM 76 for the undersides and RLM 75 and RLM 83 for the upper surfaces. A couple of gloss coats, and then the decals were applied.
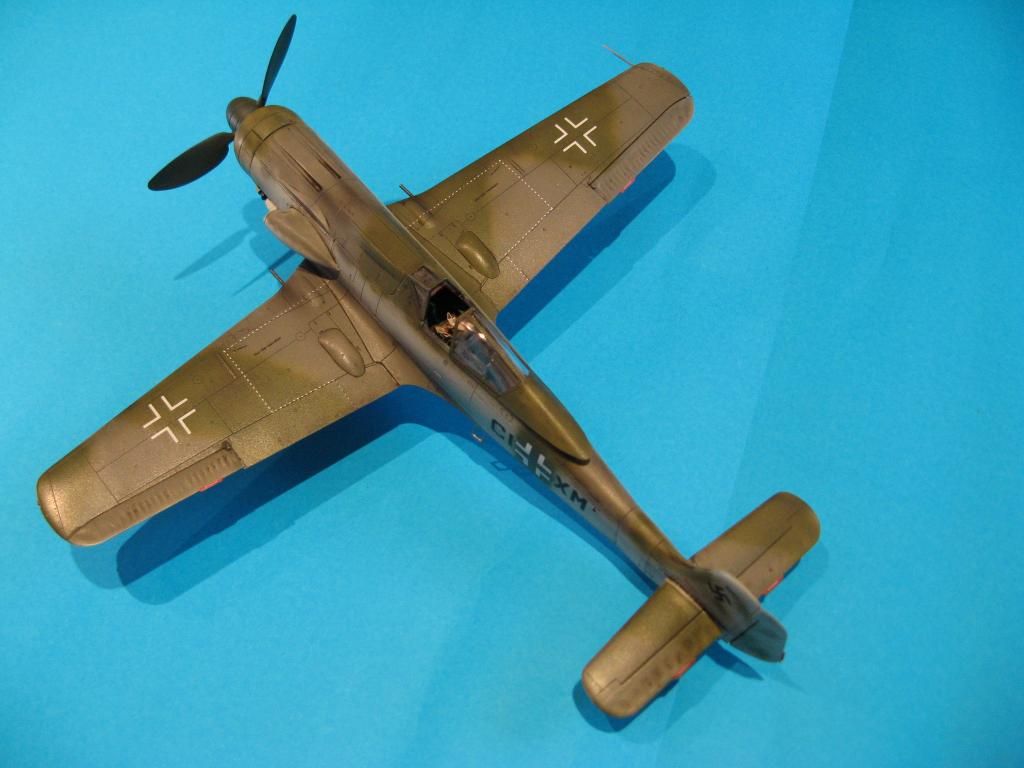
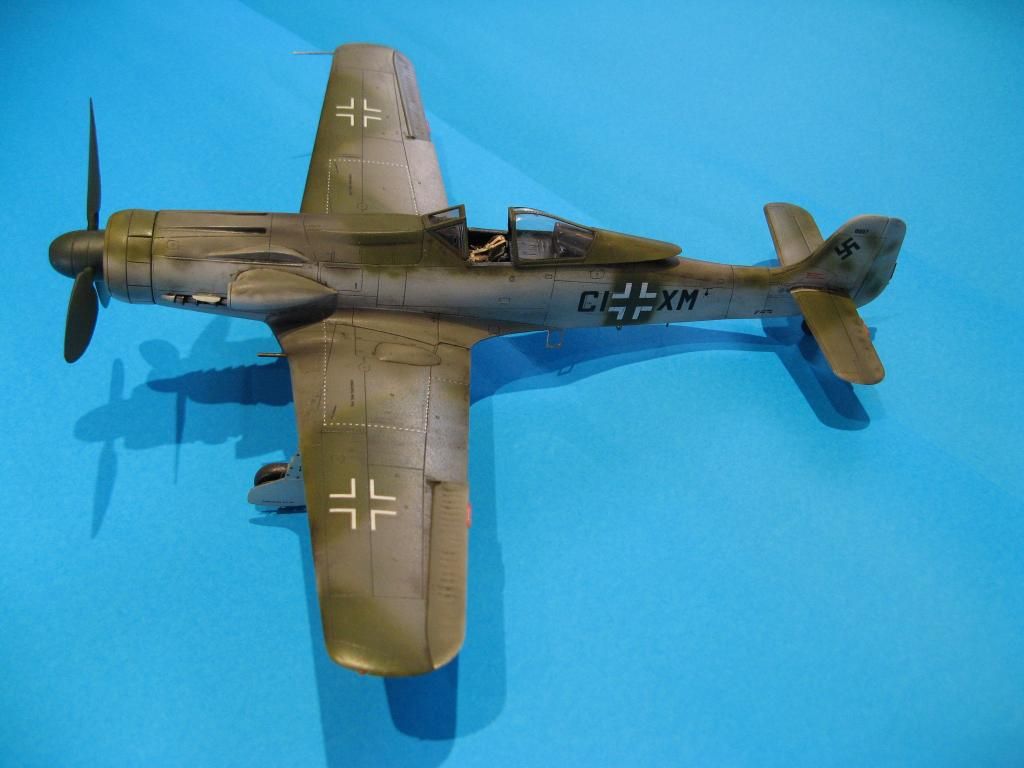
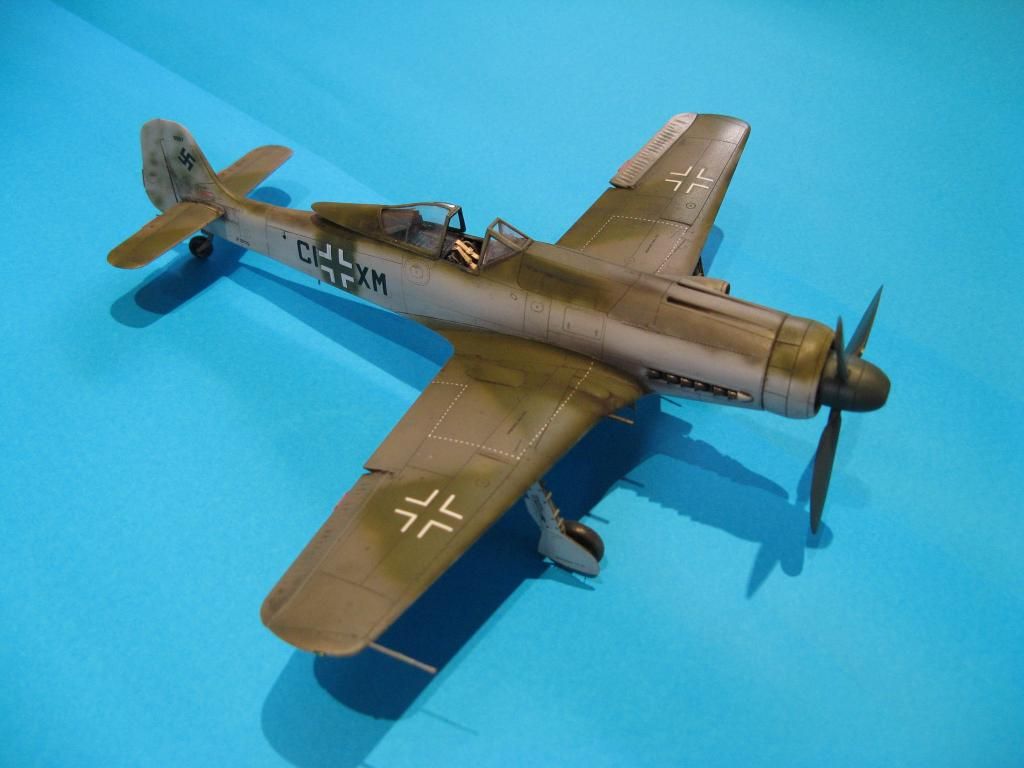
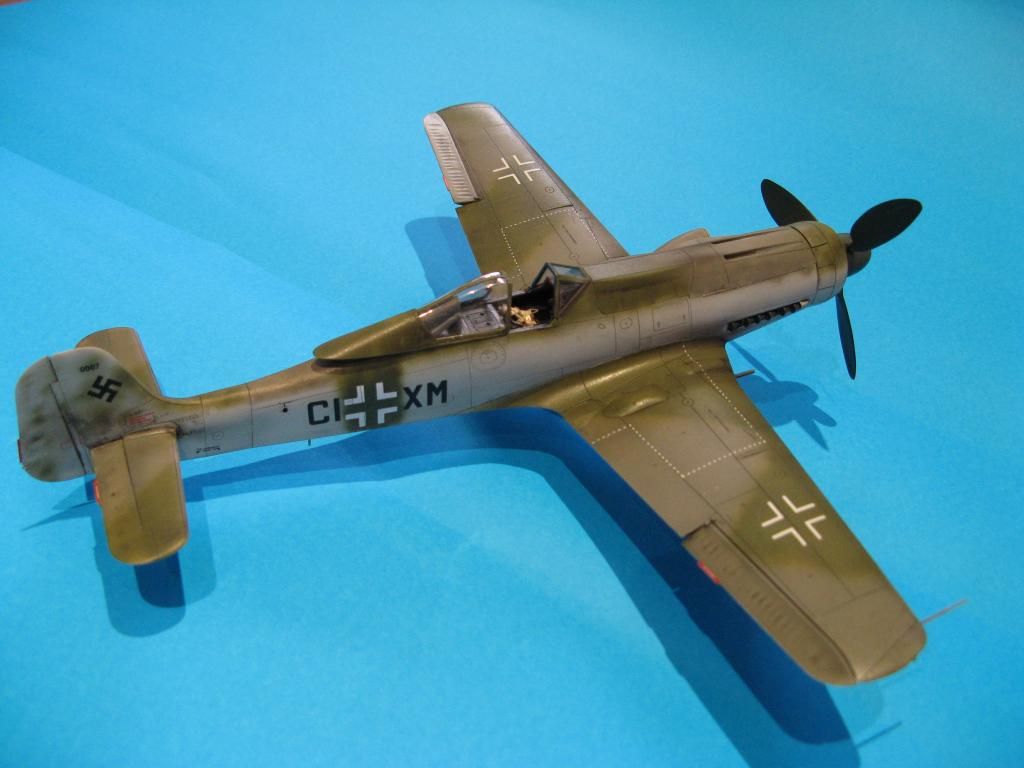
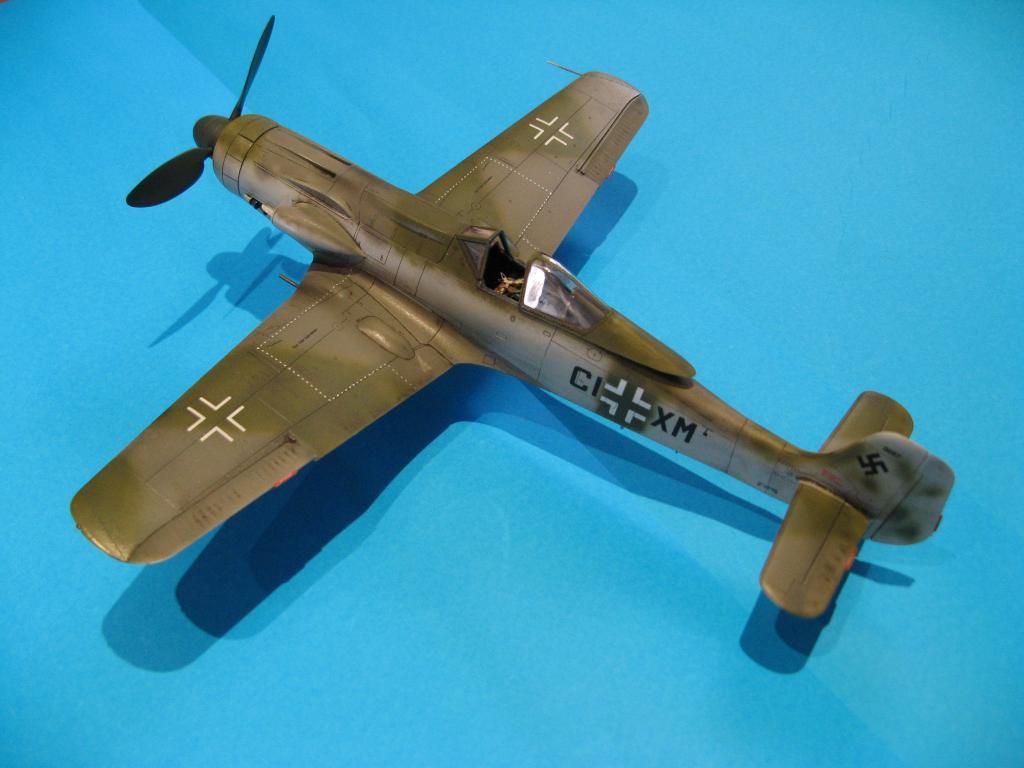
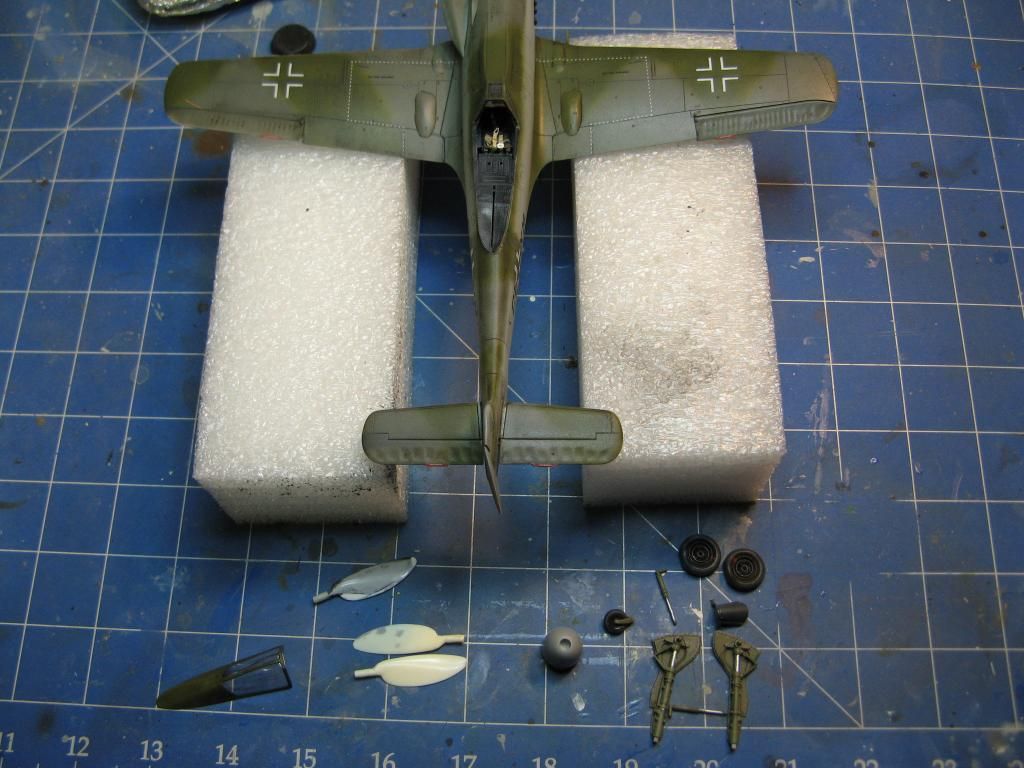
Another gloss coat was applied to seal the decals in and then a wash with Flory Models Dark Dirt was applied. This was wiped away so thet it remained in the panel lines and a final flat coat was applied. Then all that was left was fixing the final parts. You can see the corrected spinner and new propeller blades.
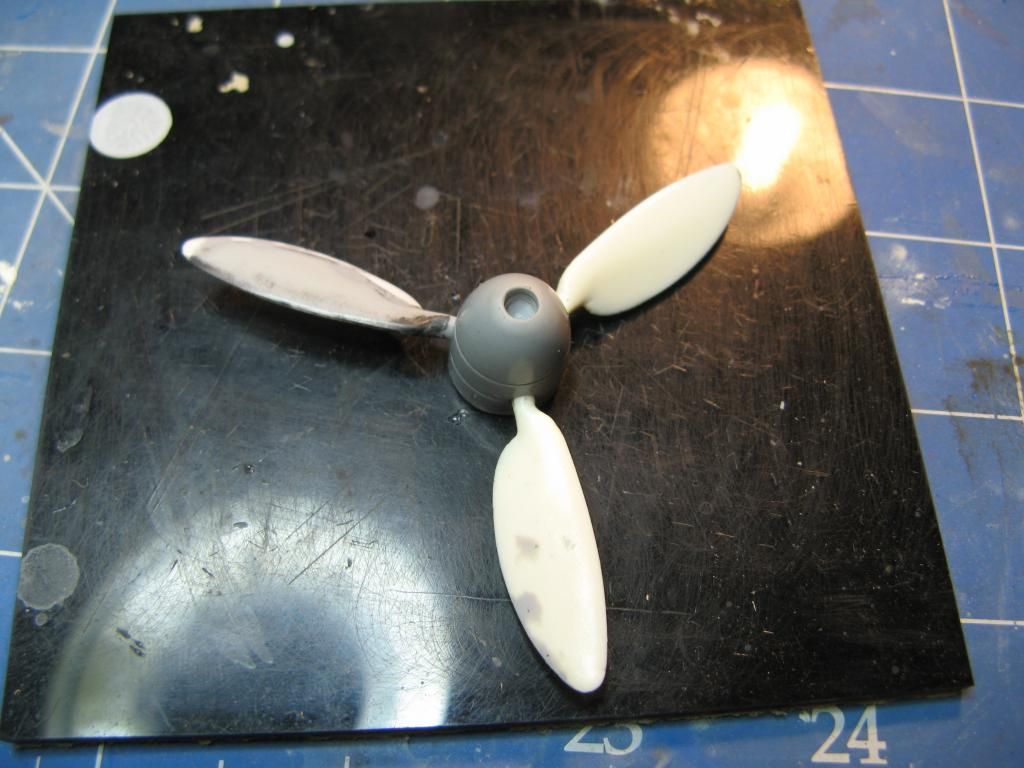
The propeller was assembled in preparation for painting in RLM 70. It's a much better representation than the kit prop or any of the after market or spares that I had.
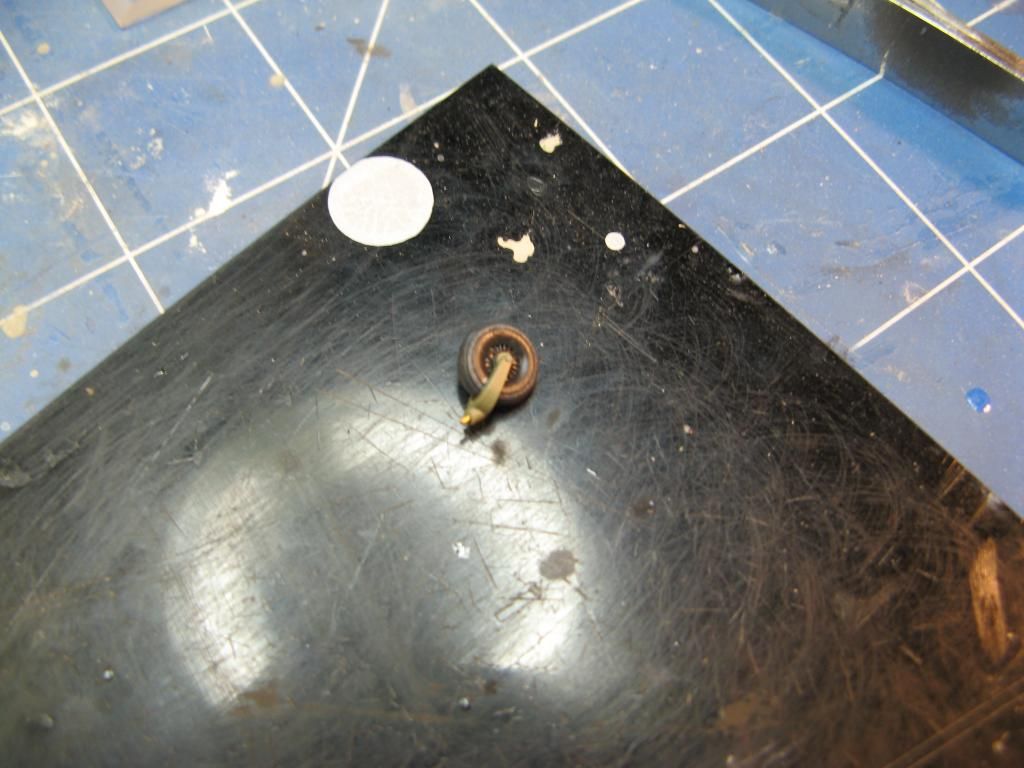
The tail wheel was fitted with a small pin so that it could be cemented securely but offset a little.
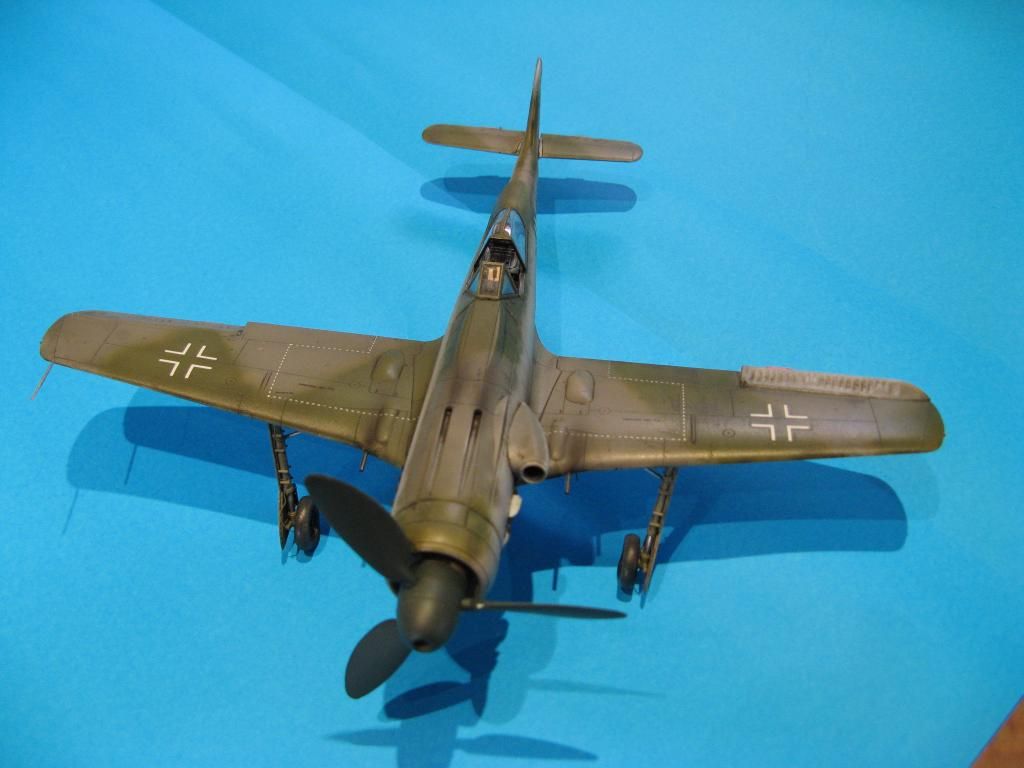
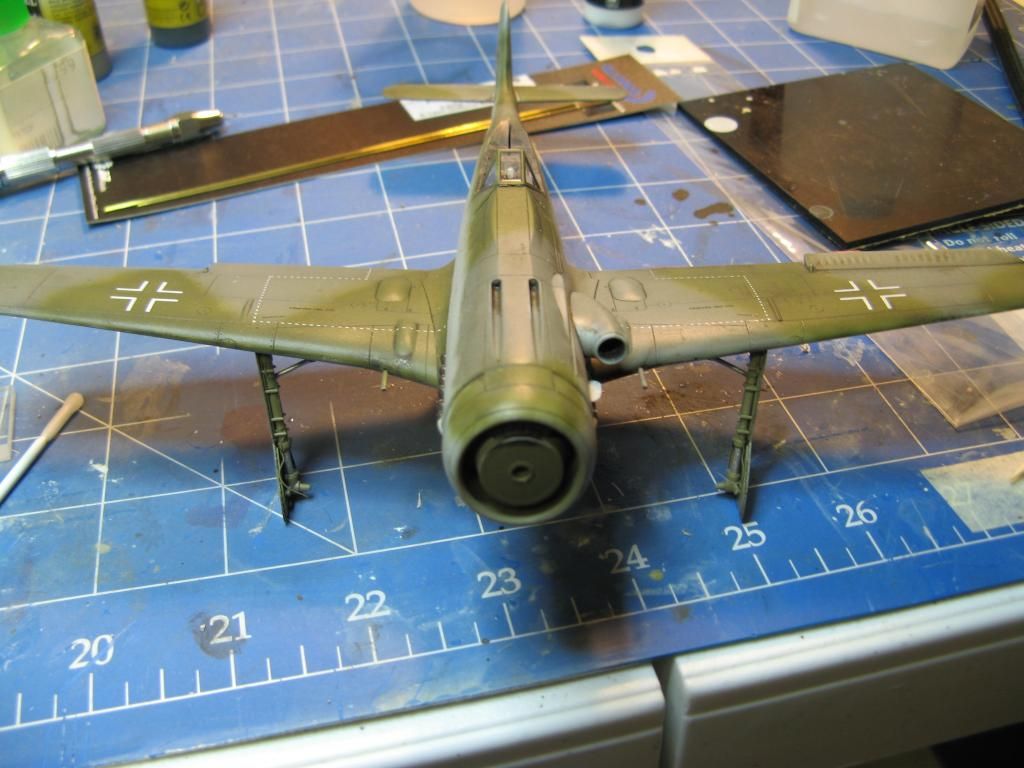
Finally it's up on it's legs.
With the prop on, main wheels, antennas, canopy and a little bit of staining from the guns and exhausts it's done. Thanks for having a look. Follow the link below to see the final reveal pictures.
Final reveal pictures are here.
The Home Stretch
We're getting to the finish line for this one. I gave the model a primer coat using the Vallejo primer. I really like the way this primer lays down a smooth coat. It's also self leveling so any spatters just blend right in.Once the primer was dry the model was inspected for any imperfections. The seam on the bottom was still faintly visible so a bit of Mr Surfacer was used to cover it up. This was then carefully sanded flush and re-primed.
Here's where I got a bit lazy and didn't take too many photos. The model was given a preshade using Vallejo black along the panel lines. Then Alclad II metallic paints were used to paint the exposed metal areas under the wings. Two shade of aluminium were used to give a subtle contrast. This was then masked off and the main camouflage colours were sprayed. RLM 76 for the undersides and RLM 75 and RLM 83 for the upper surfaces. A couple of gloss coats, and then the decals were applied.
Another gloss coat was applied to seal the decals in and then a wash with Flory Models Dark Dirt was applied. This was wiped away so thet it remained in the panel lines and a final flat coat was applied. Then all that was left was fixing the final parts. You can see the corrected spinner and new propeller blades.
The propeller was assembled in preparation for painting in RLM 70. It's a much better representation than the kit prop or any of the after market or spares that I had.
The tail wheel was fitted with a small pin so that it could be cemented securely but offset a little.
Finally it's up on it's legs.
With the prop on, main wheels, antennas, canopy and a little bit of staining from the guns and exhausts it's done. Thanks for having a look. Follow the link below to see the final reveal pictures.
Final reveal pictures are here.
Saturday, 12 July 2014
1/48 Hobby Boss Ta 152 C-0 - Part 4
Back to part 3
Hello again. It's been a long time since I last updated this but my build of this aircraft continues with some work on the propeller and spinner. I also get the wings on.
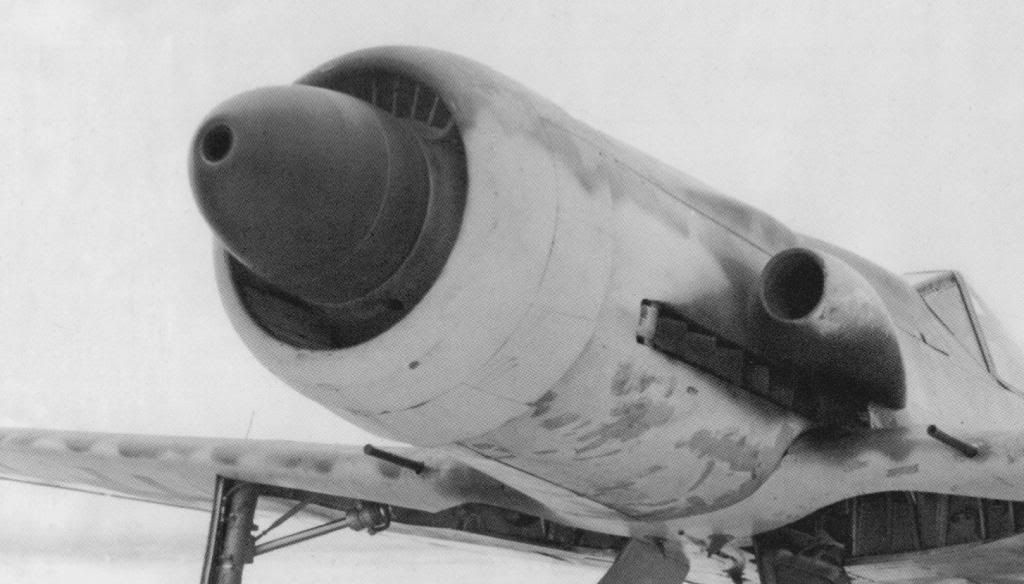
This feature is missing from the kit spinner.
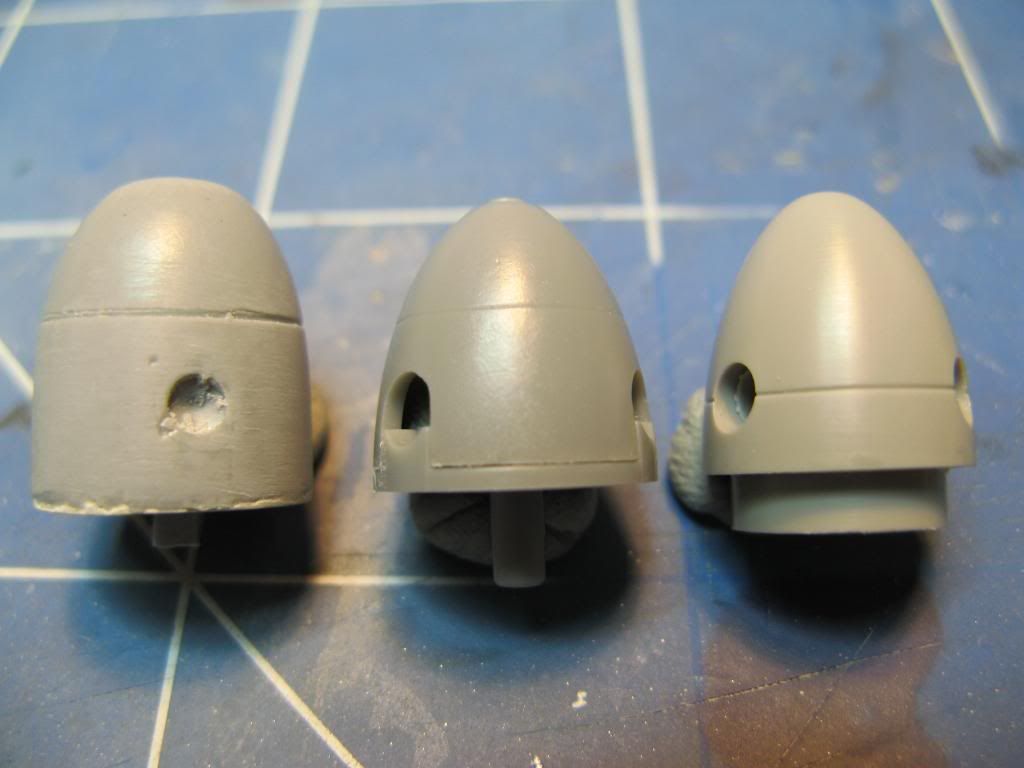
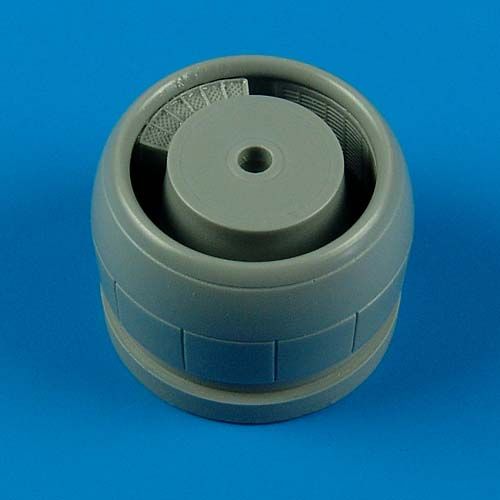
In an attempt to rectify this I bought the Quickboost spinner and propeller replacements. It was not much better than the kit so I needed to source a more correct spinner. I think I got close with the Engines and Things conversion set for the Fw 190 D-11. The three choices are shown in the image below. On the left is the Engines and Thing spinner, in the middle is the kit spinner and on the right is the Quickboost spinner. You can see they're all quite different.
I resolved to start with the Engines and Things spinner and modify it to match my references. Frankly its a pretty awful casting so there will be a fair bit of work to get it to the state that I want.
Similarly the propeller blades are the wrong shape. The actual aircraft has large paddle shaped props as shown below.
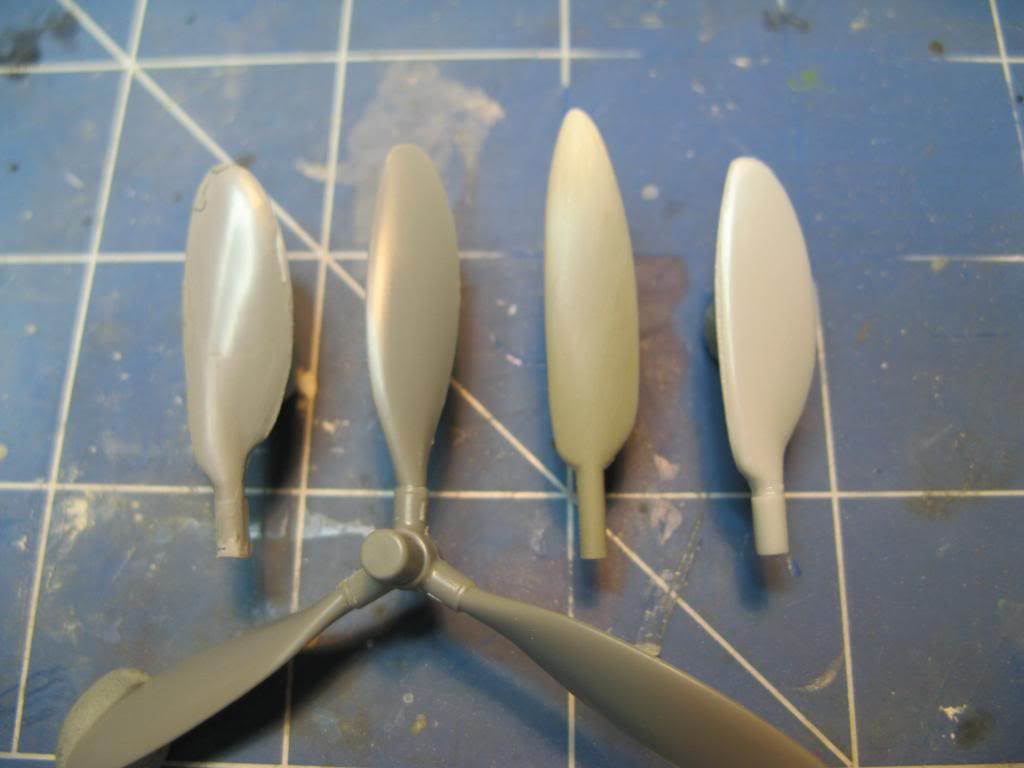
None of the alternatives I had to hand were quite right. In the picture below from left to right we have the Engines and Things prop, the kit prop, the Quickboost prop and some I had in my spares box from the Dragon Ta 152H. They are all different shapes but the closest is the one from the Dragon kit.
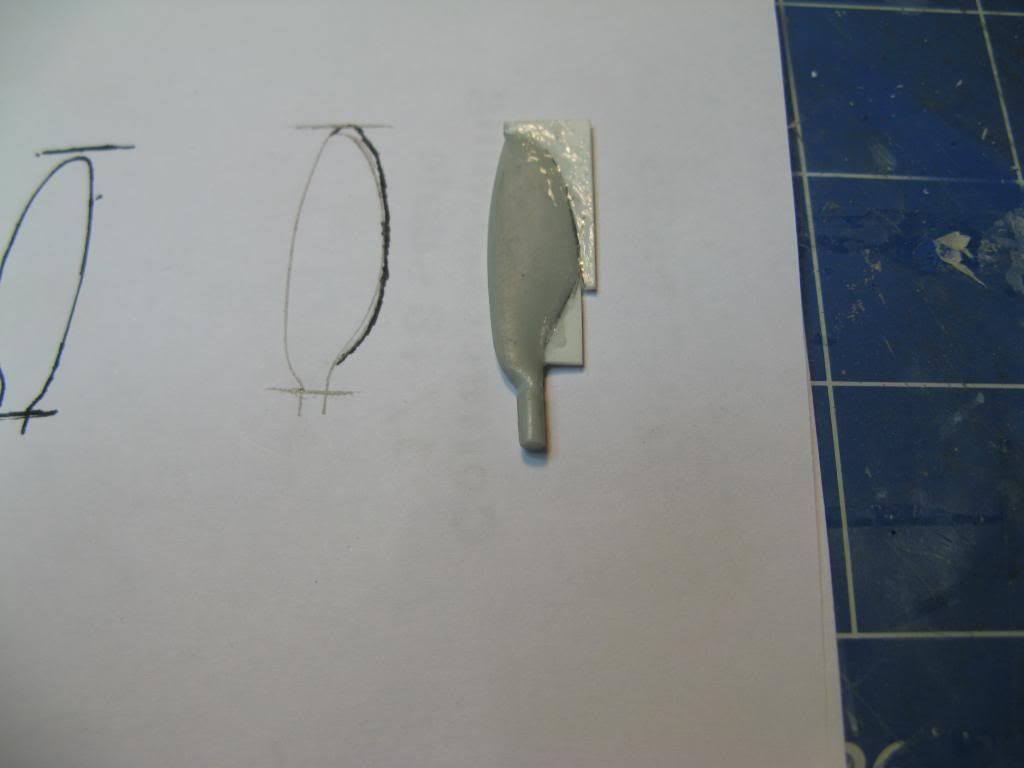
I opted to use the Dragon one as a basis for making my own. First I got measurements of the correct length from some plans I have in one of my references. This showed the Dragon blade to be too short by about 1mm. The trailing edge of the Dragon blade is also wrong where it begins to flare out. I traced the Dragon blade on paper using a pencil and made corrections to the drawing using a fine marker. I then used the corrected drawing as a template to correct the shape. I started by cutting the trailing edge off the Dragon blade and attached plasticard using plenty of super glue.
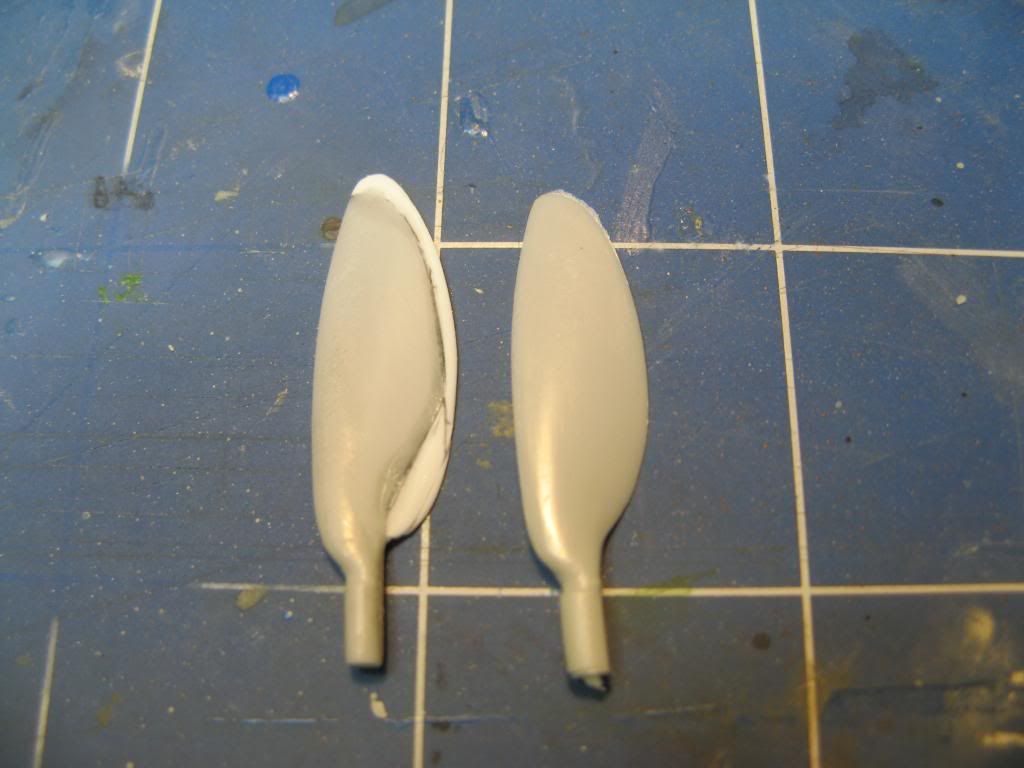
This was then shaped to match the drawing and the trailing edges thinned down. Here you can see the almost completed blade next to the original Dragon version.
It's taller, more pointed and slightly wider. Once finished it will be cast in resin to make exact duplicates.
With the propeller blade completed I finished up the main assembly by gluing the wings on.
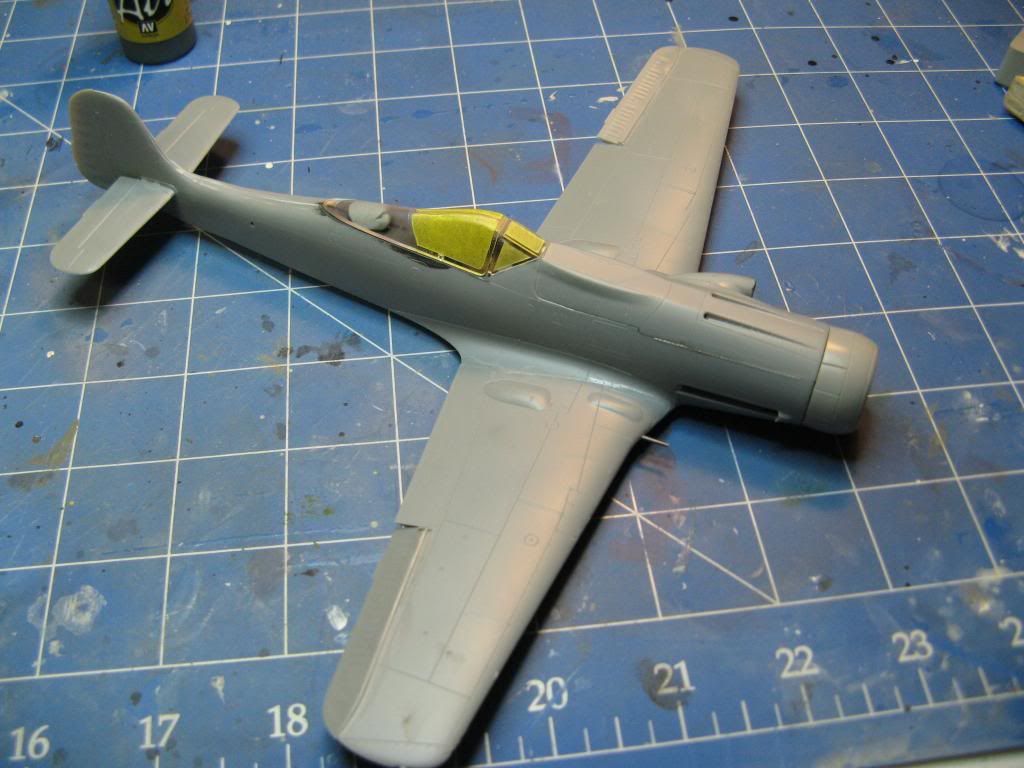
The wing and tailplane joints were pretty good. A little more assembly and we're almost ready for paint.
In the next update we'll get some paint. and decals on.
On to part 5.
Hello again. It's been a long time since I last updated this but my build of this aircraft continues with some work on the propeller and spinner. I also get the wings on.
You Spin Me Right Round
I mentioned right at the beginning that I didn't think that the spinner or prop blades were right in this kit. The aircraft I am building had a spinner design seen on the Ta152 H prototypes and on some Fw190 D prototypes. You can see in the photo below that a defining feature of this spinner is the large hole in the end.This feature is missing from the kit spinner.
In an attempt to rectify this I bought the Quickboost spinner and propeller replacements. It was not much better than the kit so I needed to source a more correct spinner. I think I got close with the Engines and Things conversion set for the Fw 190 D-11. The three choices are shown in the image below. On the left is the Engines and Thing spinner, in the middle is the kit spinner and on the right is the Quickboost spinner. You can see they're all quite different.
I resolved to start with the Engines and Things spinner and modify it to match my references. Frankly its a pretty awful casting so there will be a fair bit of work to get it to the state that I want.
Similarly the propeller blades are the wrong shape. The actual aircraft has large paddle shaped props as shown below.
None of the alternatives I had to hand were quite right. In the picture below from left to right we have the Engines and Things prop, the kit prop, the Quickboost prop and some I had in my spares box from the Dragon Ta 152H. They are all different shapes but the closest is the one from the Dragon kit.
I opted to use the Dragon one as a basis for making my own. First I got measurements of the correct length from some plans I have in one of my references. This showed the Dragon blade to be too short by about 1mm. The trailing edge of the Dragon blade is also wrong where it begins to flare out. I traced the Dragon blade on paper using a pencil and made corrections to the drawing using a fine marker. I then used the corrected drawing as a template to correct the shape. I started by cutting the trailing edge off the Dragon blade and attached plasticard using plenty of super glue.
This was then shaped to match the drawing and the trailing edges thinned down. Here you can see the almost completed blade next to the original Dragon version.
It's taller, more pointed and slightly wider. Once finished it will be cast in resin to make exact duplicates.
With the propeller blade completed I finished up the main assembly by gluing the wings on.
The wing and tailplane joints were pretty good. A little more assembly and we're almost ready for paint.
In the next update we'll get some paint. and decals on.
On to part 5.
Saturday, 15 February 2014
Hobby Boss 1/48 Ta-152 C-0 - Part 3
Back to part 2
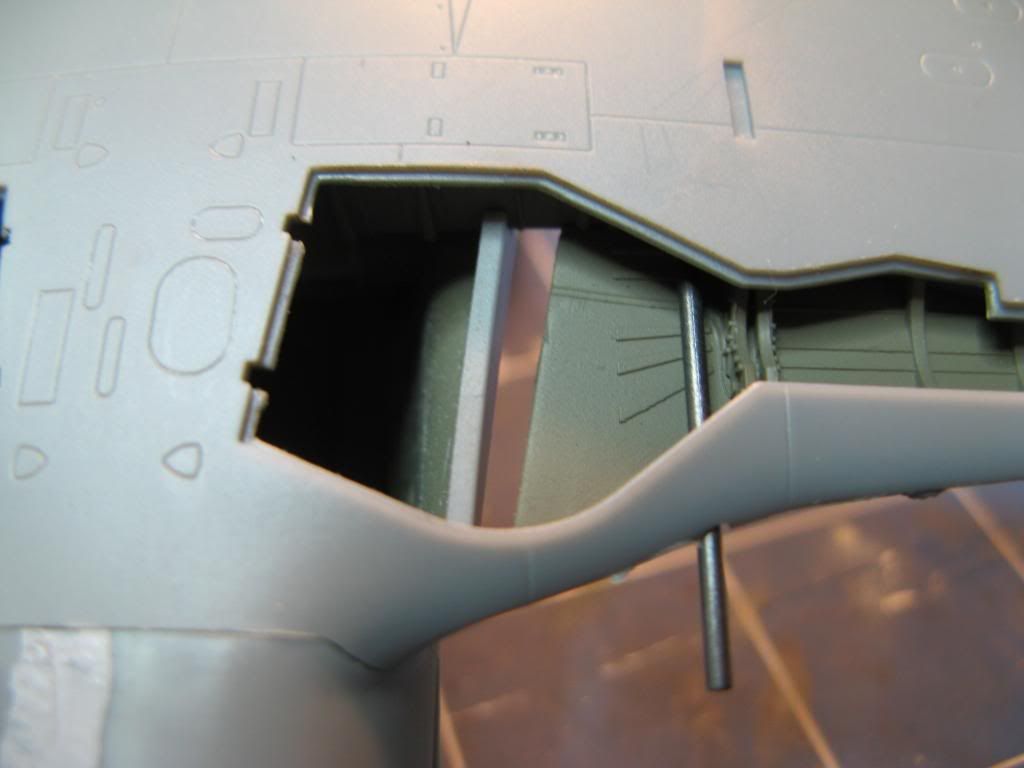
Welcome back. In this update I work on the rear of the engine, start work on the wings, sort out the radiator and fix a large gap in the wheel wells.
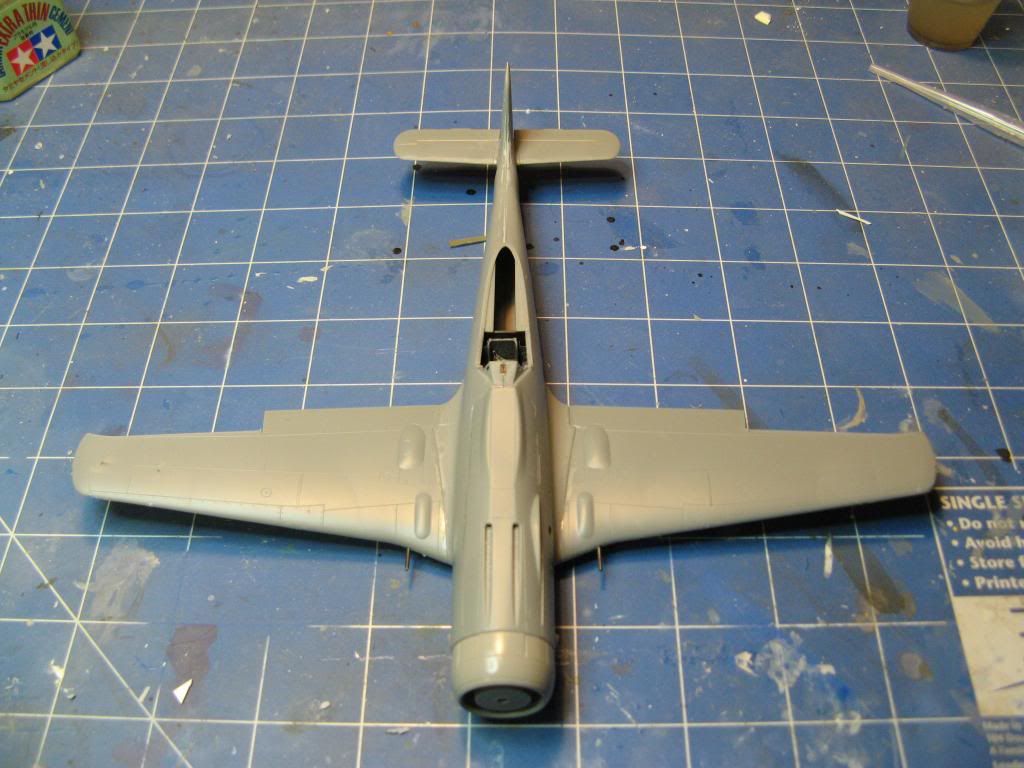
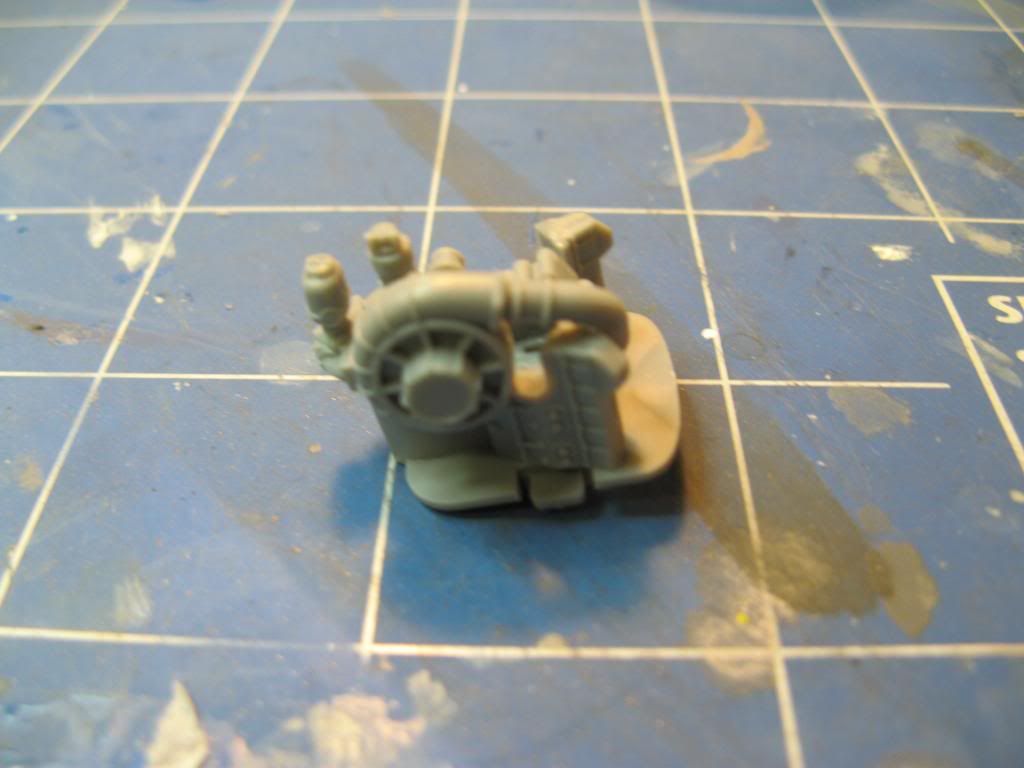
It does assemble into a rather nice representation of the back part of the engine. Pity there's no representation of the engine bearers though.
I did add a bit more detail using some lead wire before painting it.
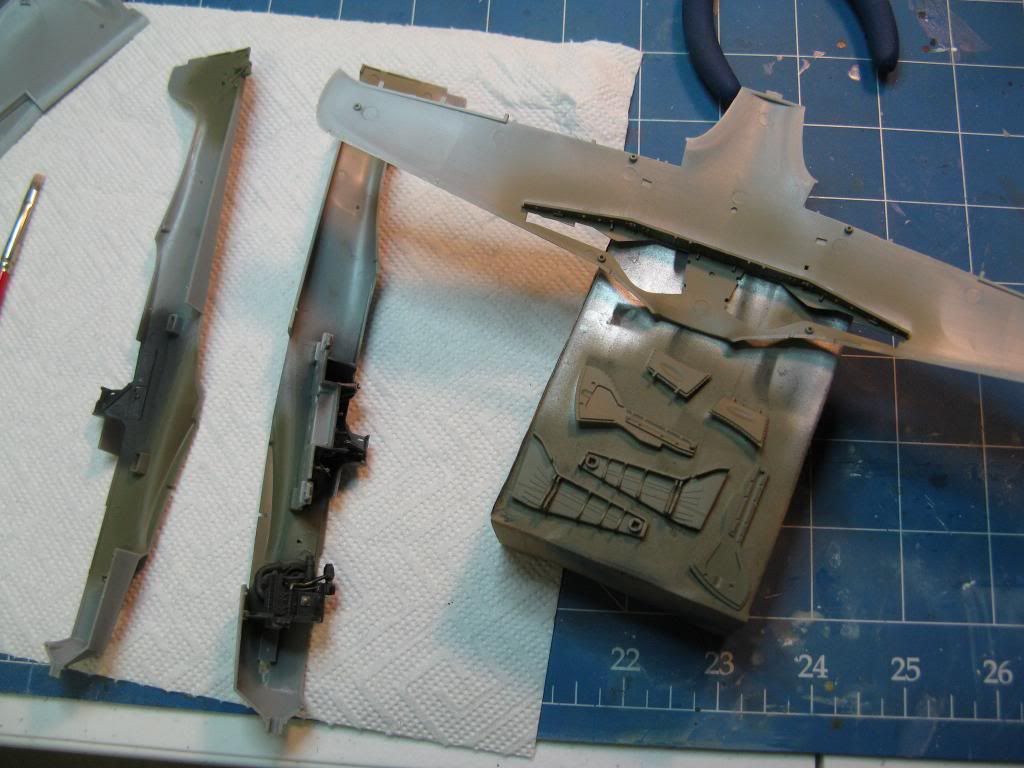
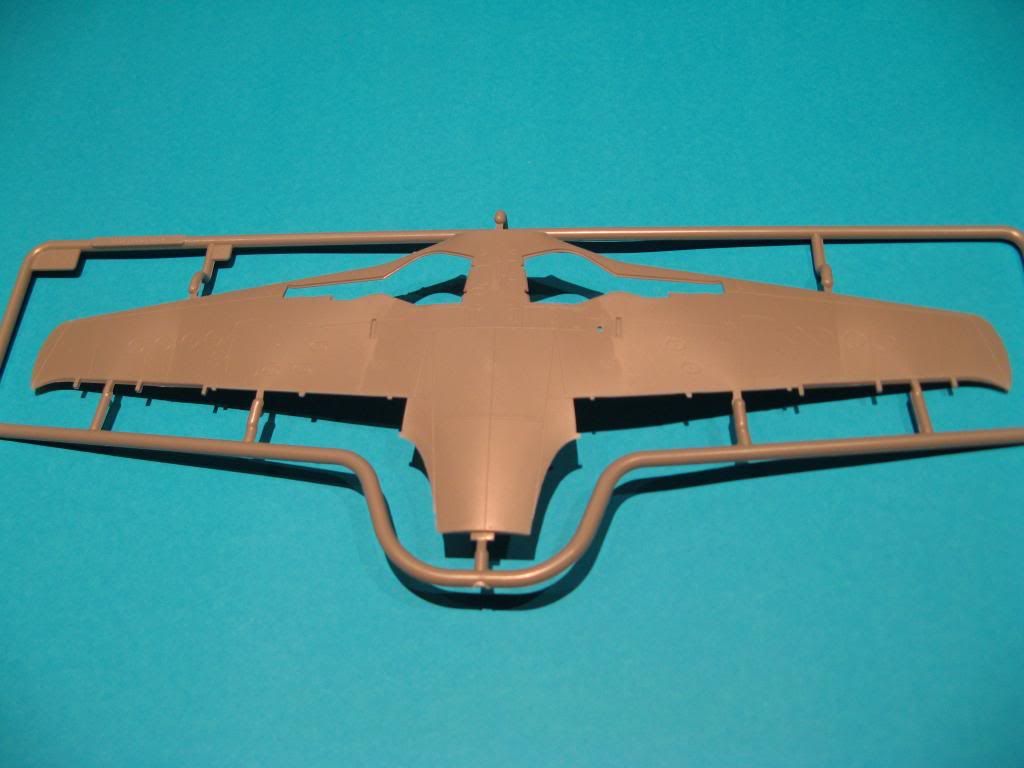
The lower wing section is moulded with gates that sit above the gluing surface. Care is needed to remove these without making a dip in the plastic. There was also a fair amount of flash on the leading edge which needed sanding off.
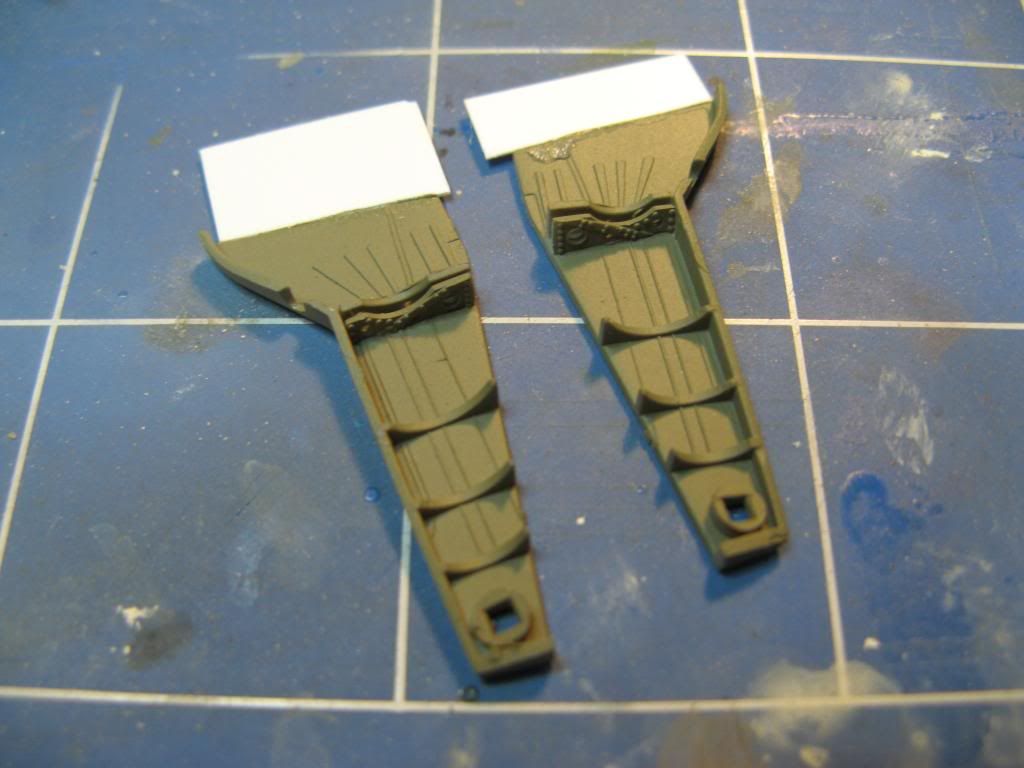
Given the wheel wells were to be painted RLM 02 grey I took the opportunity to prepare the insides of the gear doors too. Also I removed the bottom section of the tail wheel. Remember I have posed the rudder pedals off centre so I am going to have to reattach the tail wheel off centre as well.
The cowl was then glued in place. Hobby Boss give you two cowls - one has a large hump on the left hand side and the other a smaller hump. This is because the supercharger of the production, C-1, model was larger as it was to use the DB603LA engine. For a this pre-production, C-0, model the cowling with the smaller hump is correct since the DB603E was used. The fit was pretty good.
I first cut off the nose of the kit where the radiator assembly attaches. This was done with a razor saw and carefully sanded square. Then I used a razor saw to remove the casting block from the resin replacement and very carefully sanded it square using coarse wet and dry sand paper and plenty of water. Once dried the new resin radiator assembly was glued onto the fuselage. I am happy with the fit - enough of a gap to give the impression that the radiator cooling flaps can move.
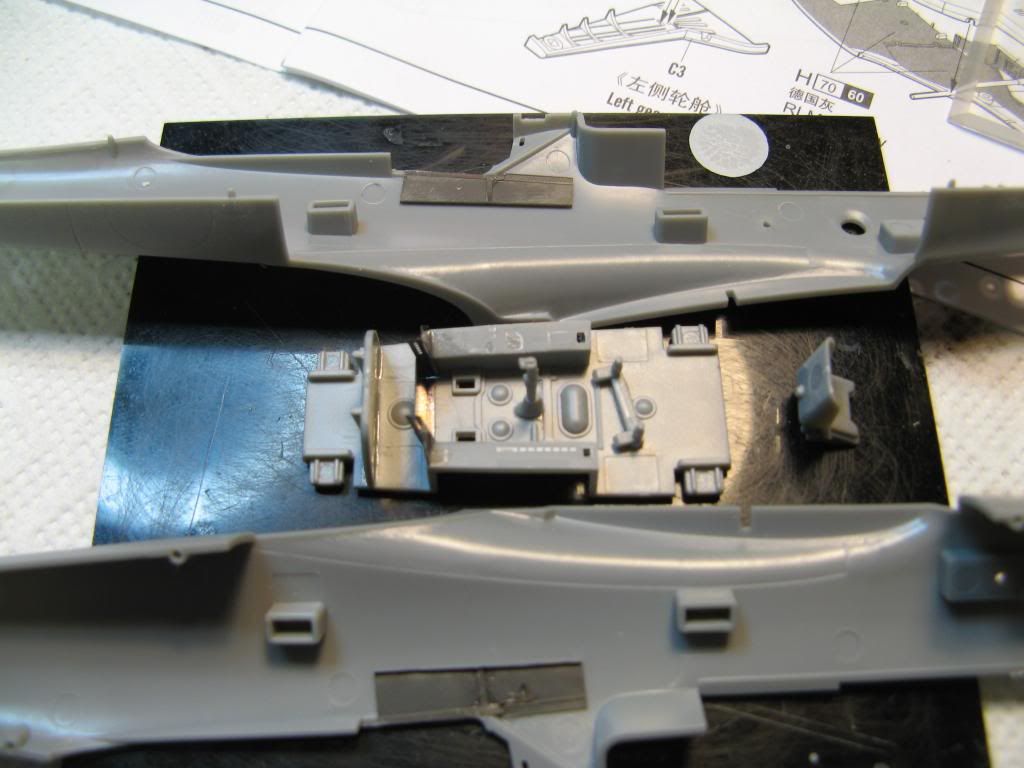
This called for extreme corrective action. First plasticard sheet was used to extend the length of the wheel well. I made a bit of a mess with the glue but I can clean that up later.
Once the glue had dried this sheet was then carefully trimmed to fit and a lip was glued onto the forward section. The wheel wells were then dry fit and with a black marker were used to draw a notch on the fuselage wing mating surface. This notch was then carefully cut out with a scriber and a sharp knife.
The wheel wells and inside the fuselage where they will mate was give a quick spray with RLM 02 grey and, hey presto, the gap has been taken care of.
That's all for this update. In the next update I'll tackle the propeller and get the main assembly completed.
On to part 4.
Welcome back. In this update I work on the rear of the engine, start work on the wings, sort out the radiator and fix a large gap in the wheel wells.
Power Egg
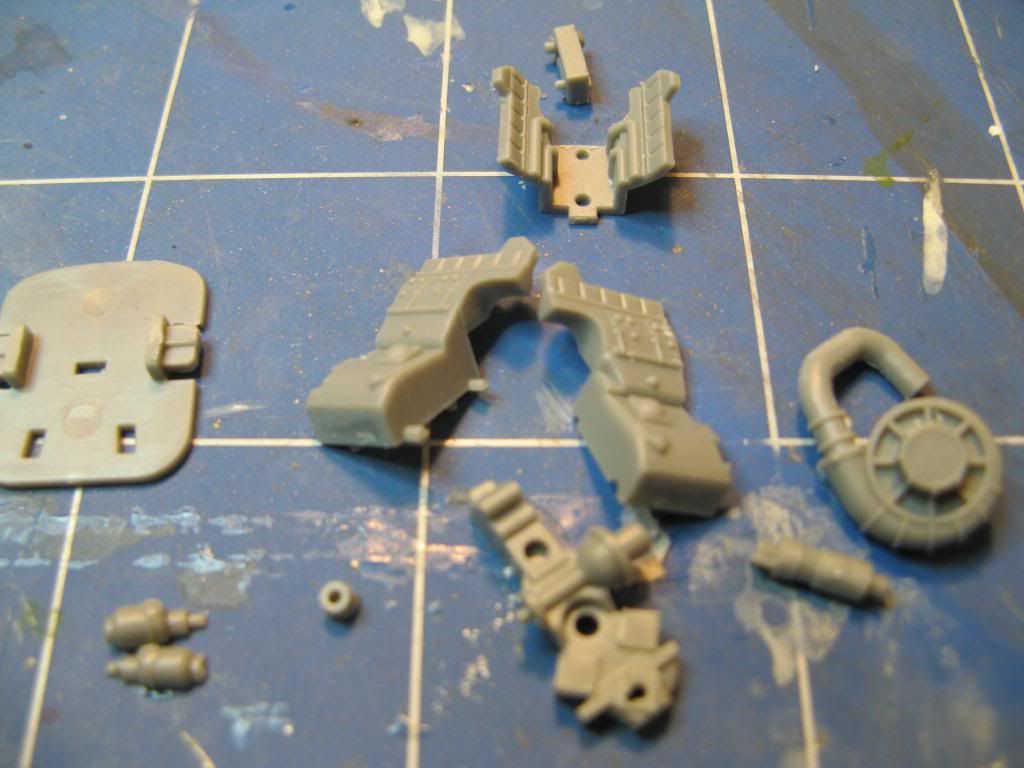
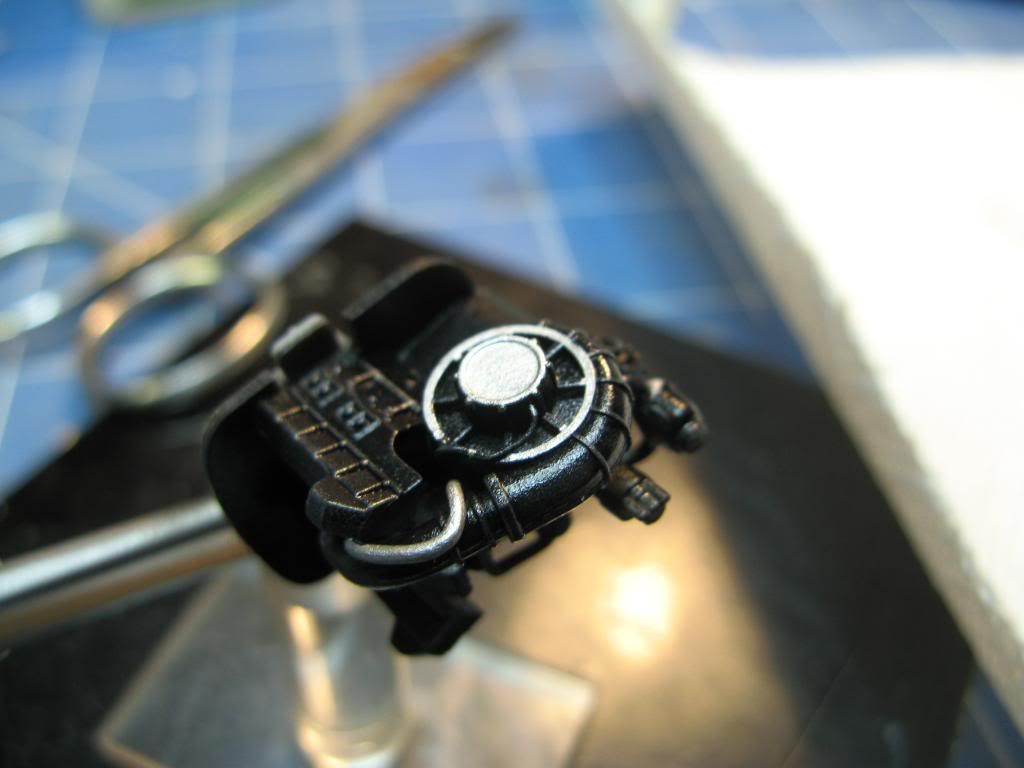
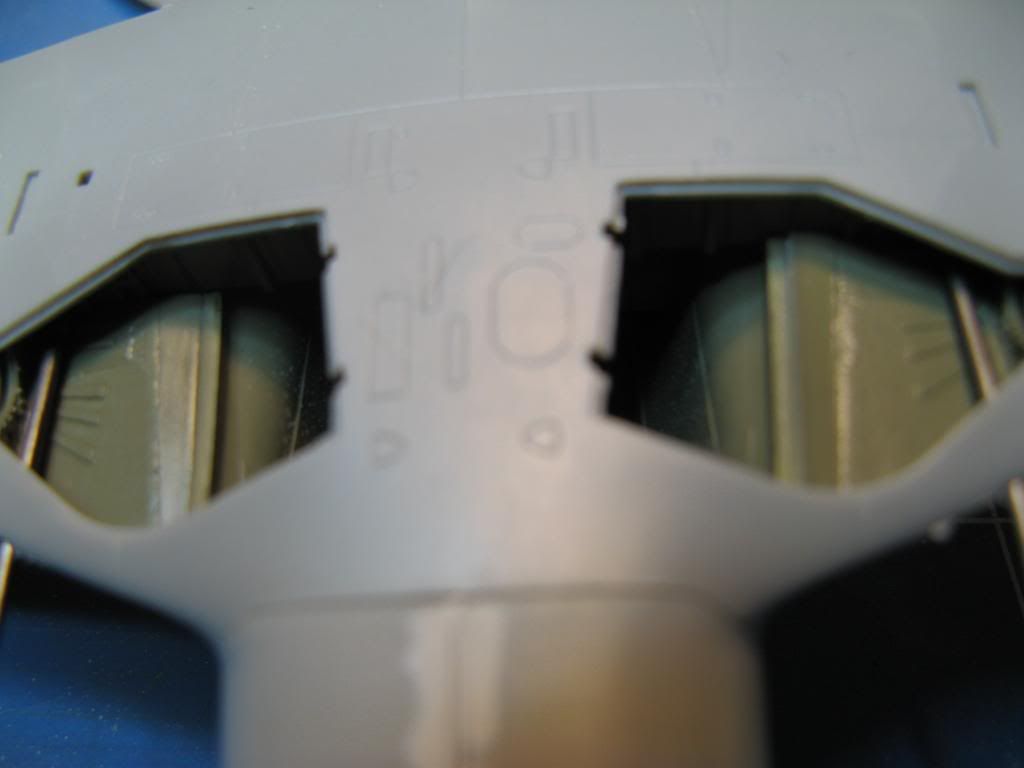
In the Ta-152 and in the Fw 190D from which it is derived the rear of the engine can be seen through the wheel wells. Hobby Boss have allowed for this in the form of the rear part of a DB603E engine. This is quite details as can be seen from the number of parts required to assemble it.It does assemble into a rather nice representation of the back part of the engine. Pity there's no representation of the engine bearers though.
I did add a bit more detail using some lead wire before painting it.
Winging it
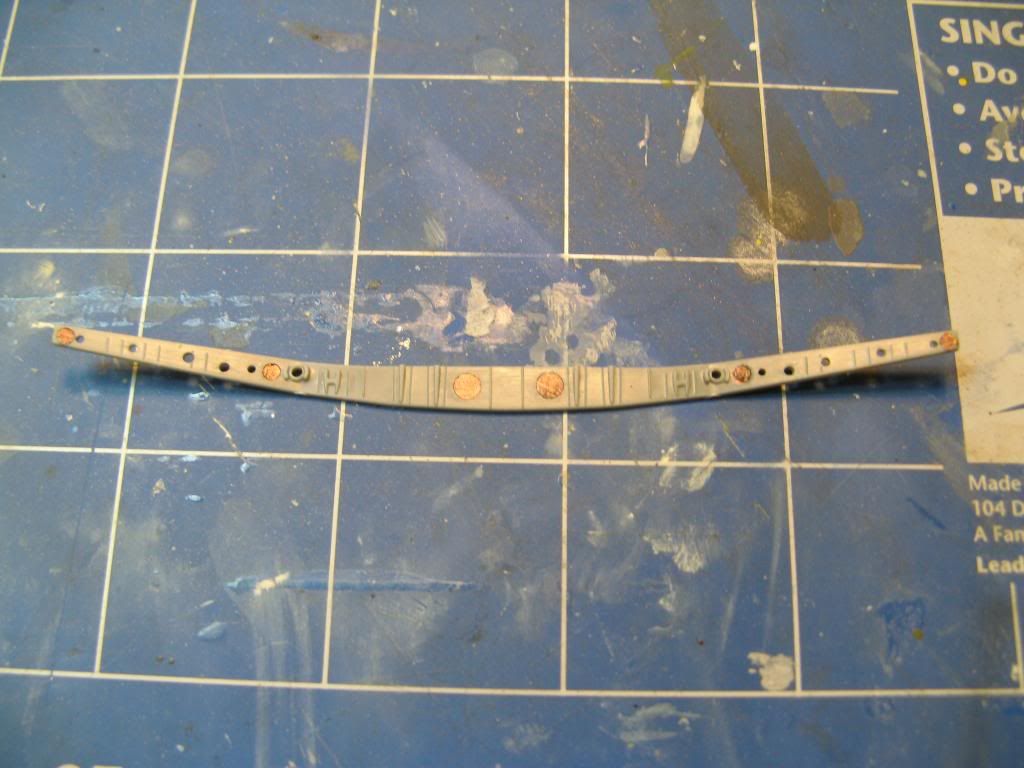
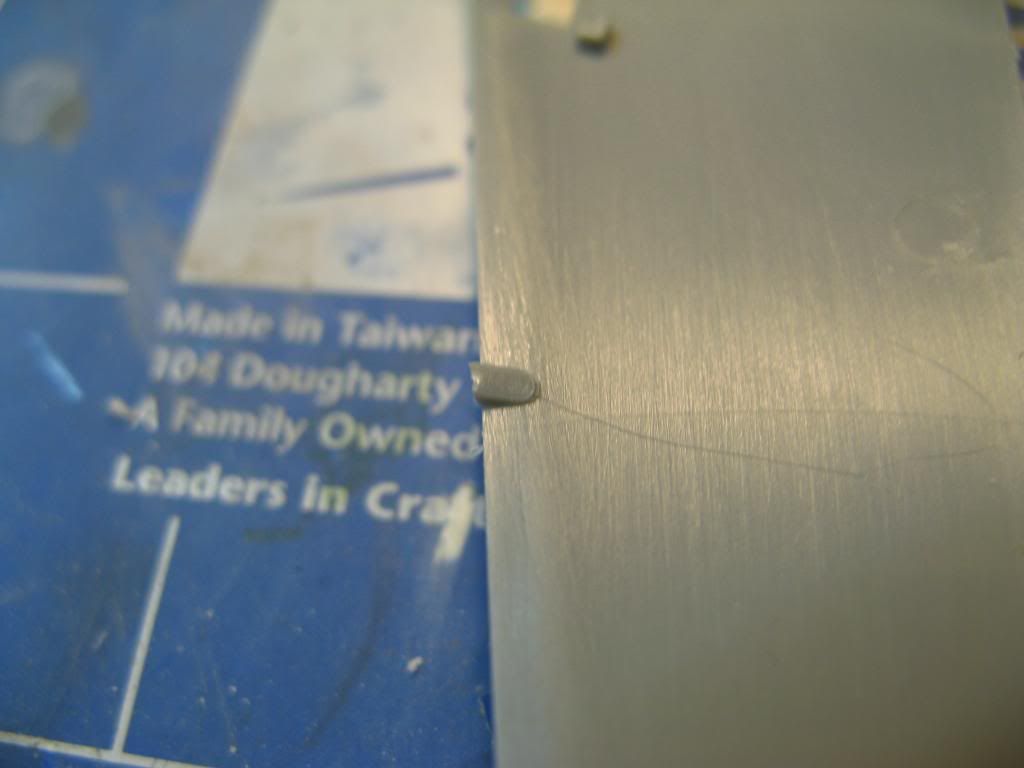
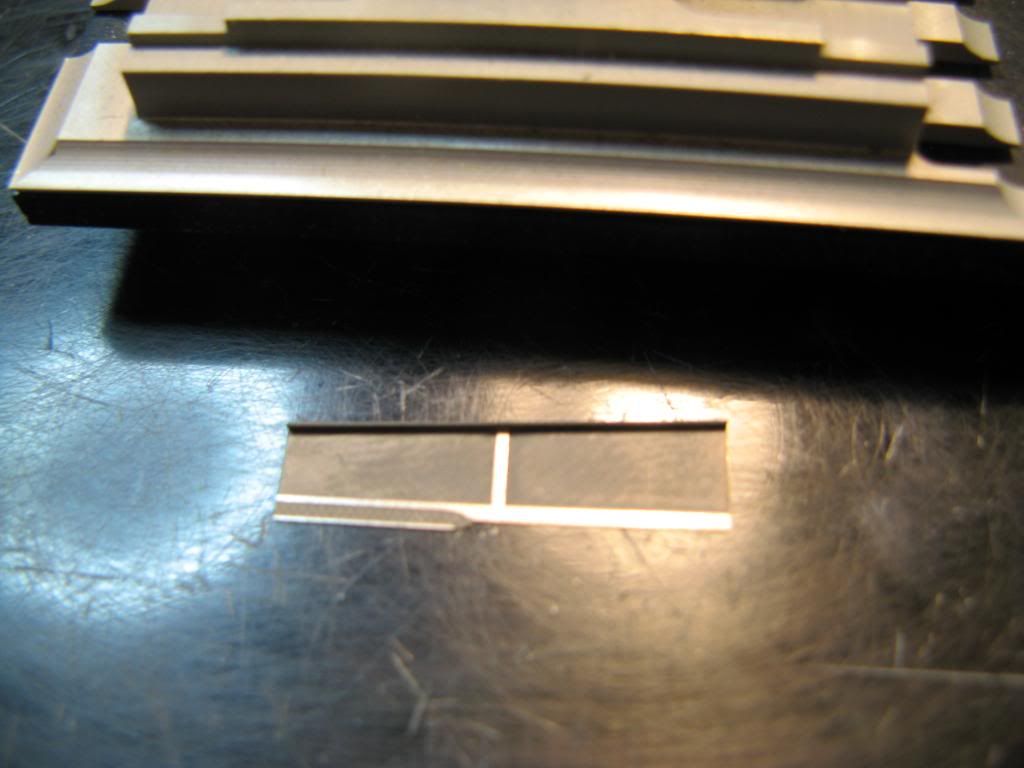
Assembly of the wings commences with the main spar which sits at the rear of the wheel wells. This part had six ejection pin marks which needed to be taken care of. I've coloured them in with a black marker pen to make them easier to see and to to indicate when they have been sanded out.The lower wing section is moulded with gates that sit above the gluing surface. Care is needed to remove these without making a dip in the plastic. There was also a fair amount of flash on the leading edge which needed sanding off.
Given the wheel wells were to be painted RLM 02 grey I took the opportunity to prepare the insides of the gear doors too. Also I removed the bottom section of the tail wheel. Remember I have posed the rudder pedals off centre so I am going to have to reattach the tail wheel off centre as well.
Don't Blow a Fuse
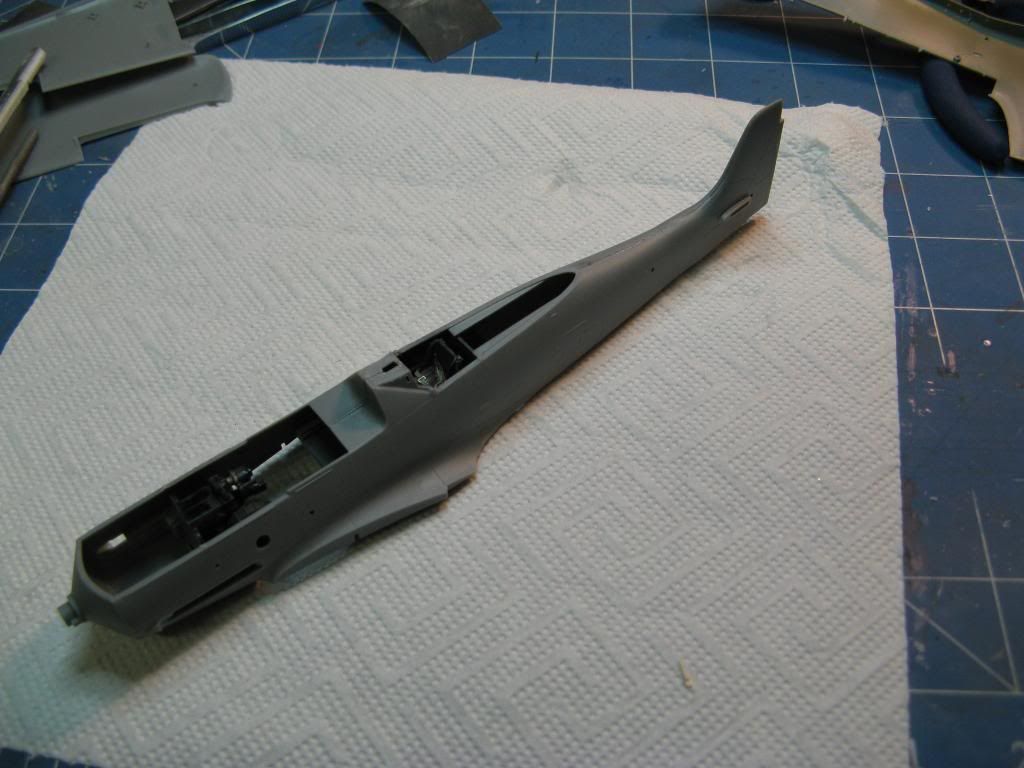
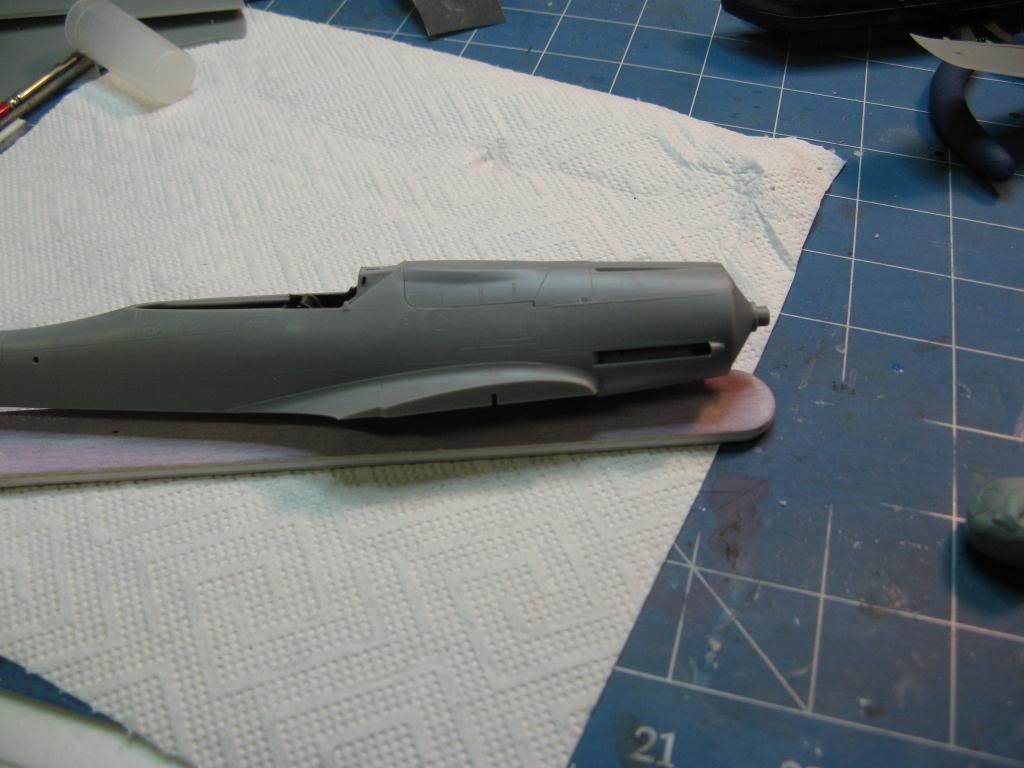
After painting the internals the fuselage was glued together. The fit was pretty good but there was some pressure needed on the instrument shroud which I tacked with super glue before gluing the rest.The cowl was then glued in place. Hobby Boss give you two cowls - one has a large hump on the left hand side and the other a smaller hump. This is because the supercharger of the production, C-1, model was larger as it was to use the DB603LA engine. For a this pre-production, C-0, model the cowling with the smaller hump is correct since the DB603E was used. The fit was pretty good.
Amputation
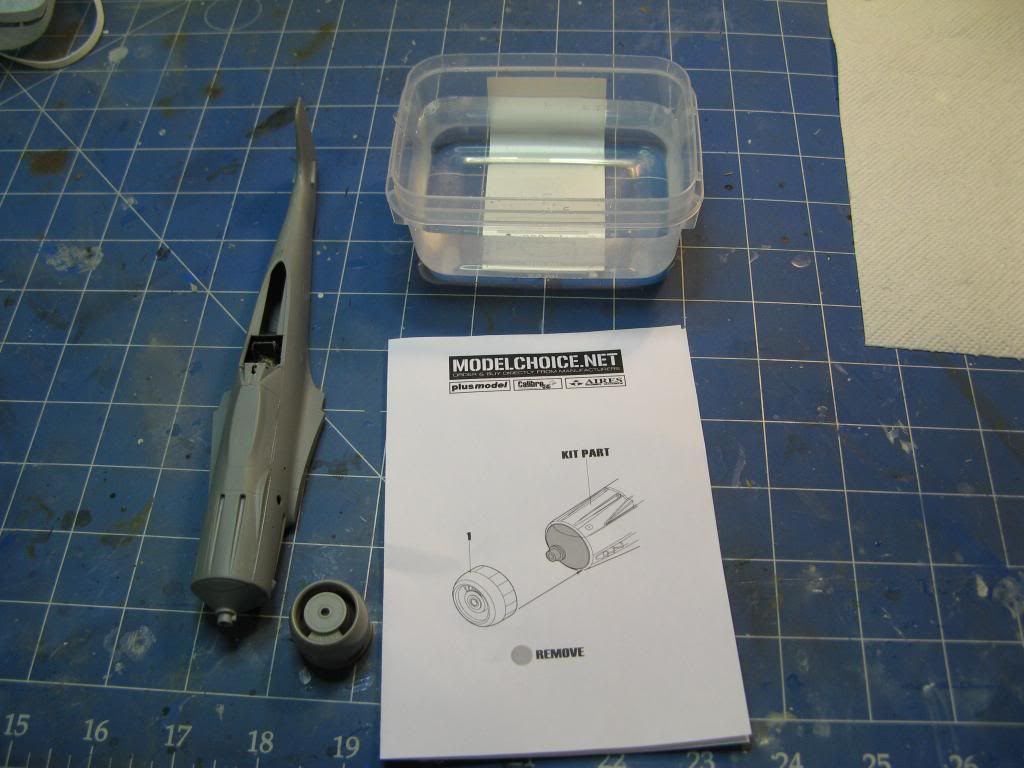
I mentioned in an earlier part that the Hobby Boss kit has the wrong radiator arrangement. This is corrected with a replacement from Quickboost. Here the patient is being prepared for surgery. The tub of water is for sanding the resin replacement. It keeps the dust down if you sand the resin wet.I first cut off the nose of the kit where the radiator assembly attaches. This was done with a razor saw and carefully sanded square. Then I used a razor saw to remove the casting block from the resin replacement and very carefully sanded it square using coarse wet and dry sand paper and plenty of water. Once dried the new resin radiator assembly was glued onto the fuselage. I am happy with the fit - enough of a gap to give the impression that the radiator cooling flaps can move.
The Grand Canyon Appears
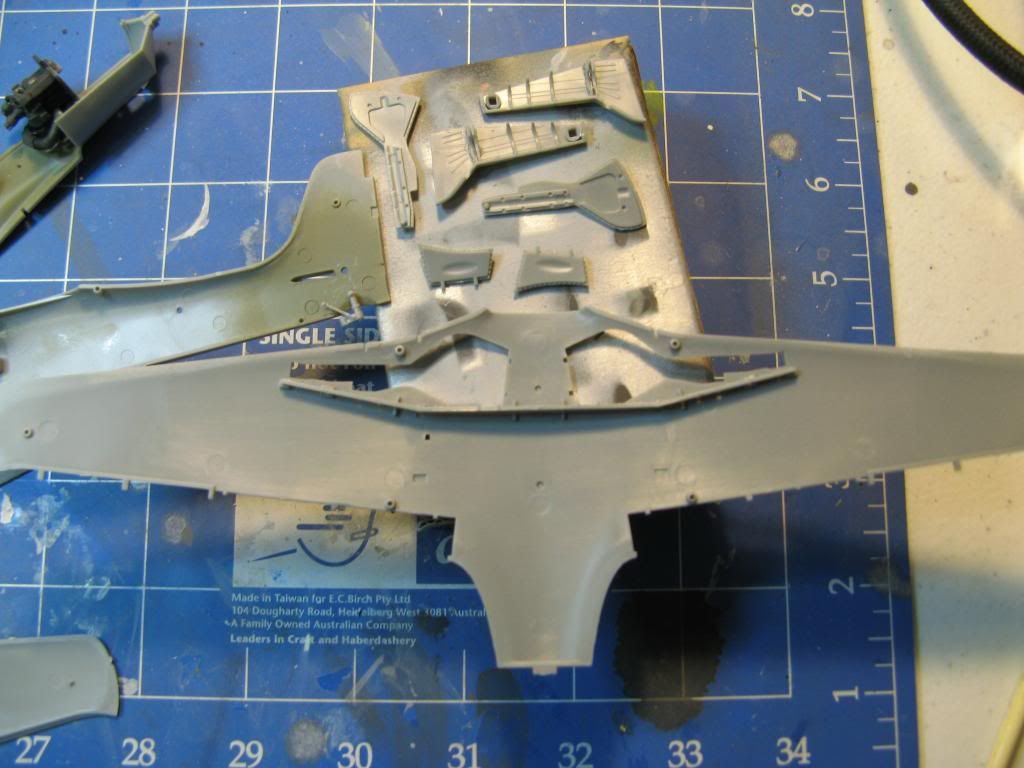
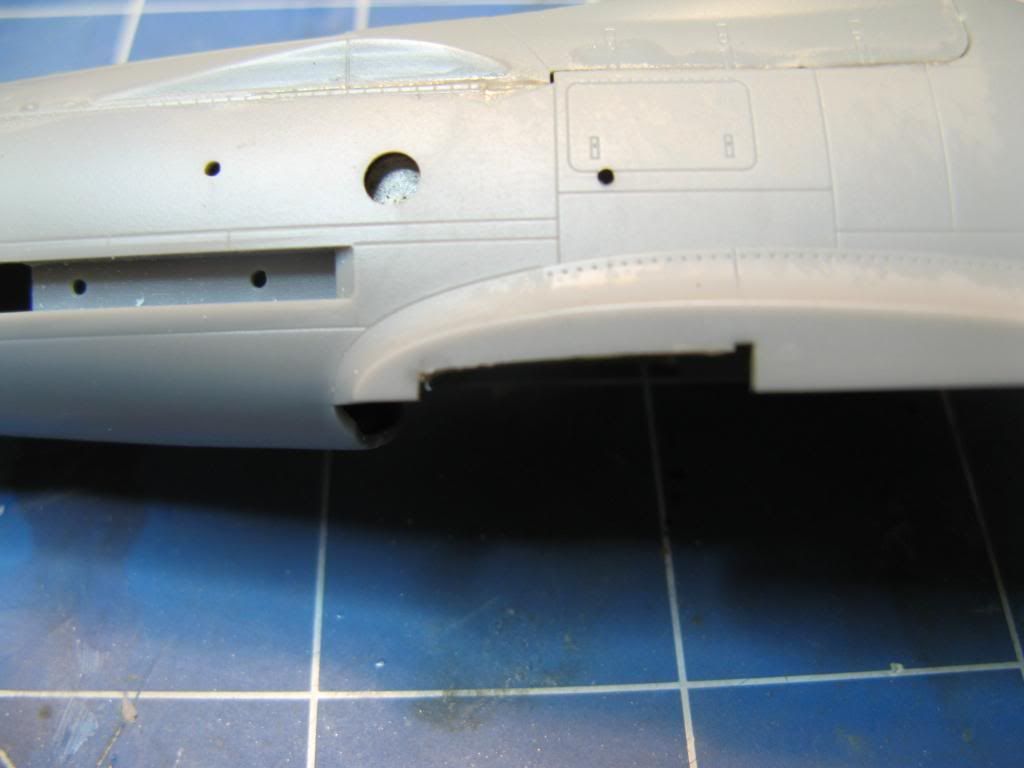
When I test fit the lower wing to the fuselage with the wheel wells in place I noticed the first major issue with the fit of this kit. There is a massive gap between the wheel well and the wing mating surface on the fuselage. Check out the amount of daylight you can see!This called for extreme corrective action. First plasticard sheet was used to extend the length of the wheel well. I made a bit of a mess with the glue but I can clean that up later.
Once the glue had dried this sheet was then carefully trimmed to fit and a lip was glued onto the forward section. The wheel wells were then dry fit and with a black marker were used to draw a notch on the fuselage wing mating surface. This notch was then carefully cut out with a scriber and a sharp knife.
The wheel wells and inside the fuselage where they will mate was give a quick spray with RLM 02 grey and, hey presto, the gap has been taken care of.
That's all for this update. In the next update I'll tackle the propeller and get the main assembly completed.
On to part 4.
Thursday, 26 December 2013
Hobby Boss 1/48 Ta-152 C-0 - Part 2
Back to part 1.
The cockpit sidewalls are photoetch. These have a lip on them at the bottom which required careful folding. I don't know how I would have done this if I did not have the right tool for the job.
The rudder bar and the control column have been offset a bit. Since the kit has poseable control surfaces I'll place the ailerons and rudder to match. I'll have to remember to pose the tail wheel too or it might look a bit odd. Detail as been removed from the side consoles. This will be replaced with photoetch once the cockpit has been painted.
The photoetch rudder pedals from the kit were added to the rudder bar. I was going to use the Eduard replacements for this but one of them flew off into space as I cut it from the frame. I should have known better than to cut it unsecured. Of course after hunting around for it on the floor for about 20 minutes and then deciding to use the kit rudder pedals, I found it right next to the sprue it was cut from after I had done all the painting.
Looking at the layout of the cockpit it is apparent that Luftwaffe pilots had unfeasibly long legs in order to reach the rudder pedals.
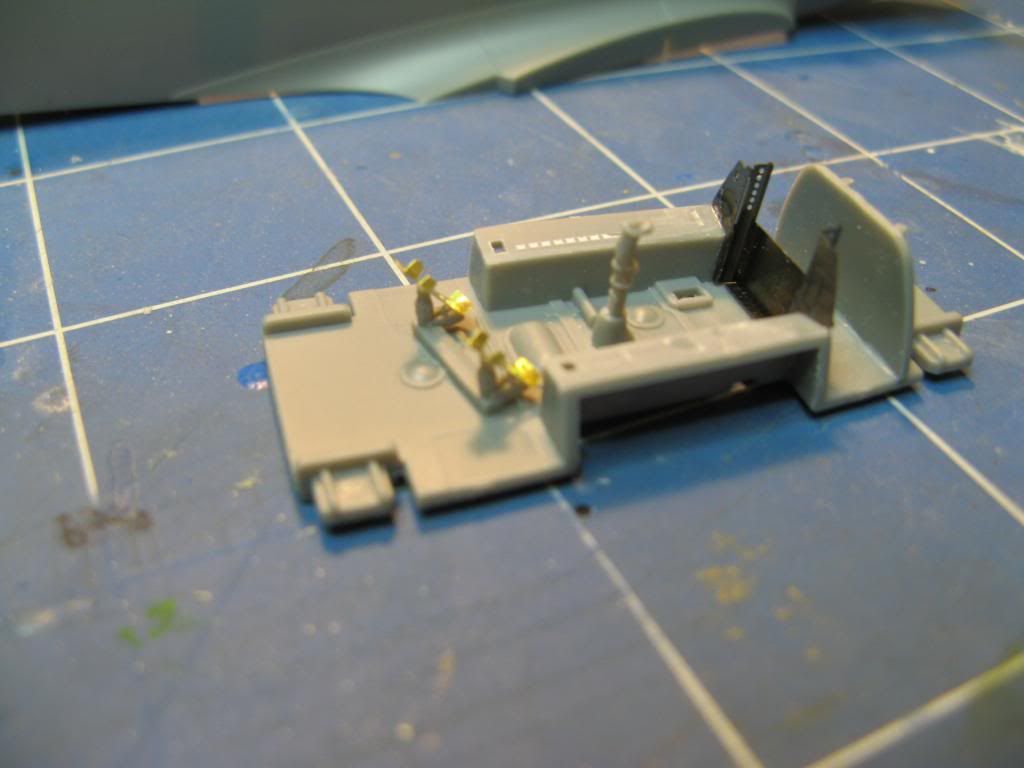
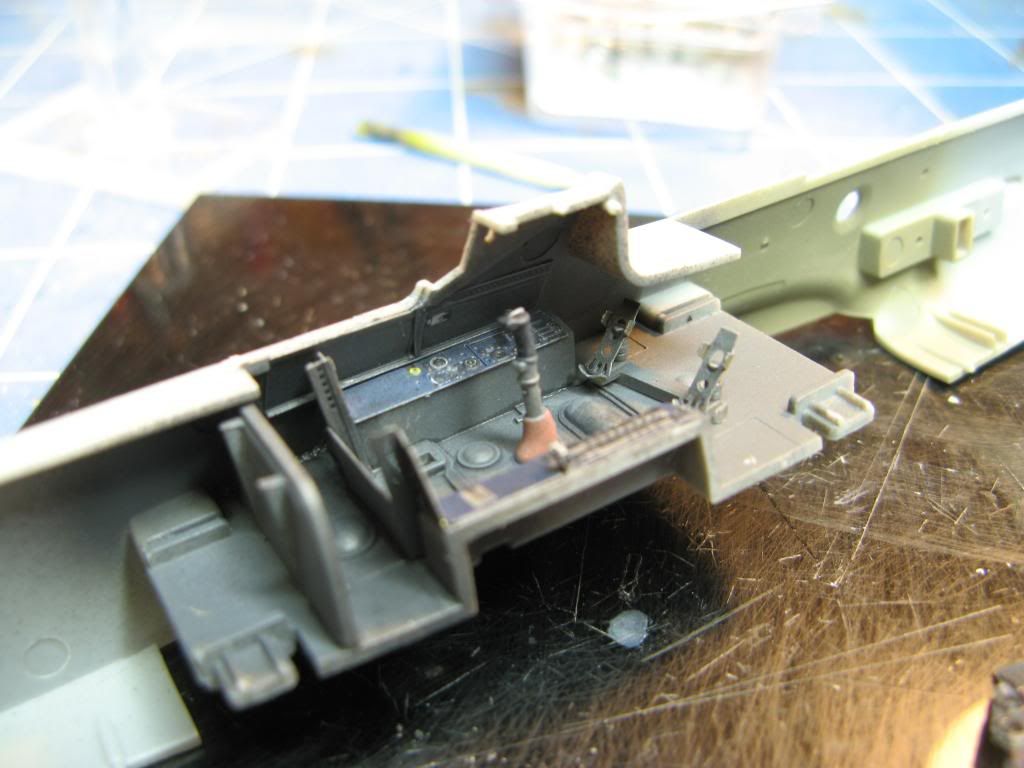
The cockpit was given a coat of paint. Luftwaffe cockpits of this era were painted in RLM 66 Black-Grey. The closest colour I have to this is Vallejo 71.055. The cockpit was drybrushed in a lighter shade of grey and then in lightly Citadel Chainmail. Scratches were done with a prismacolor silver pencil. I also sprayed the engine bay and the area around the tail wheel. These were in Vallejo 71.044 which is a good match to RLM 02 grey.
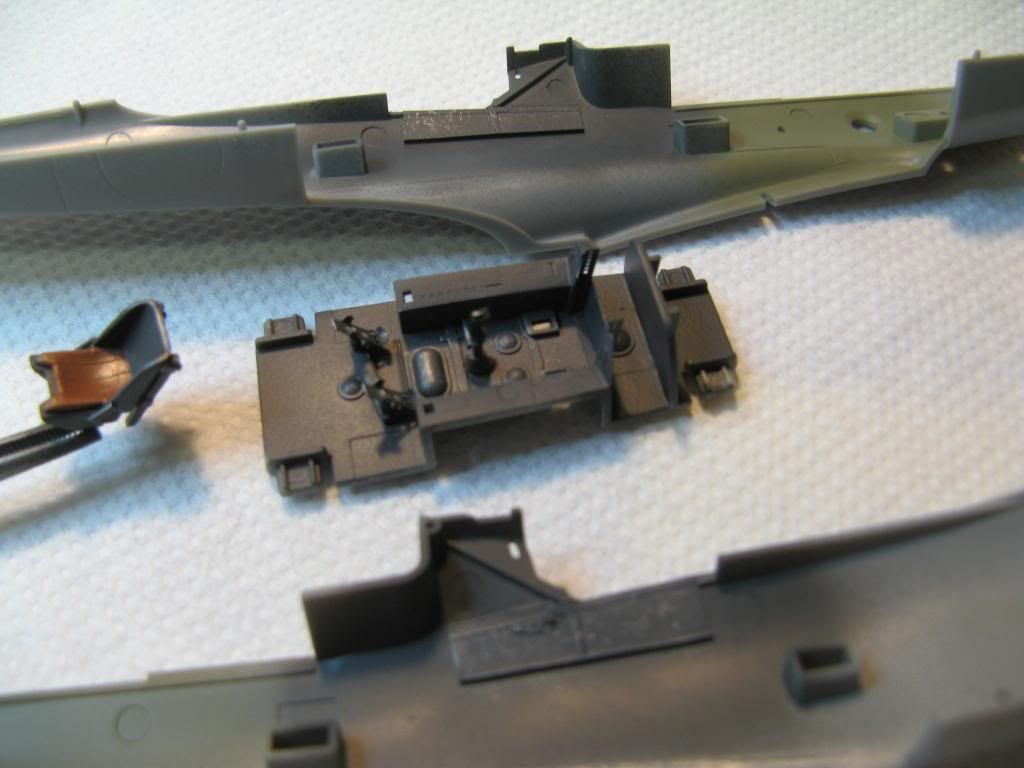
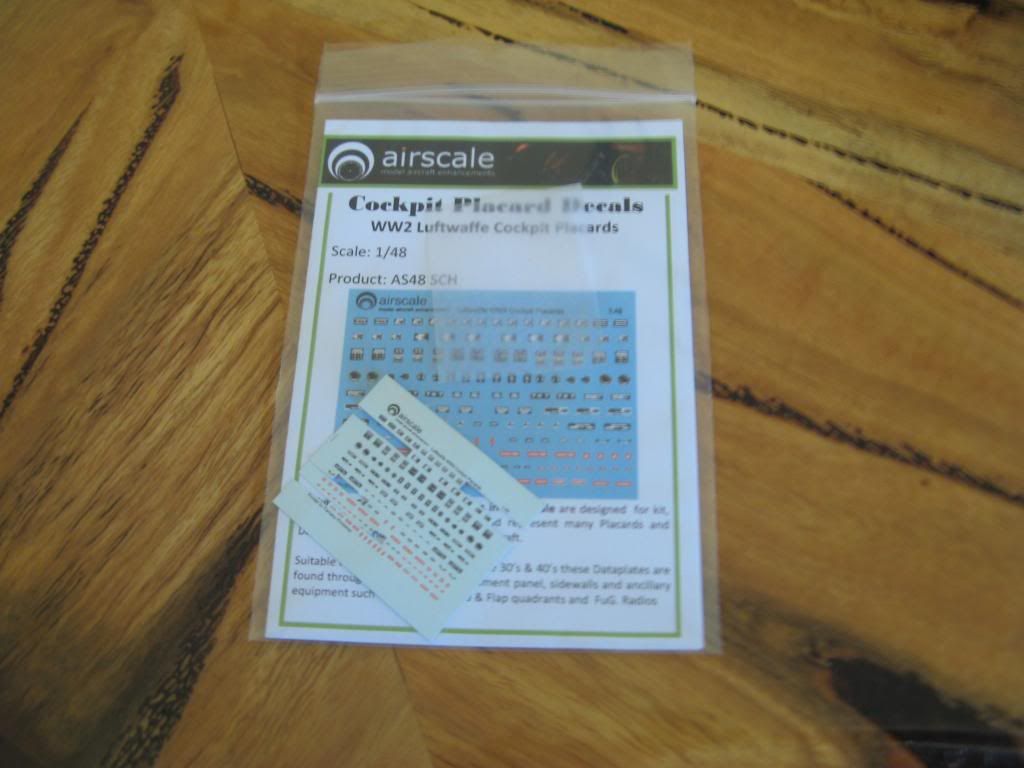
The cockpit was given a gloss coat and a few placards were placed using the Airscale WW2 Luftwaffe Placards set.
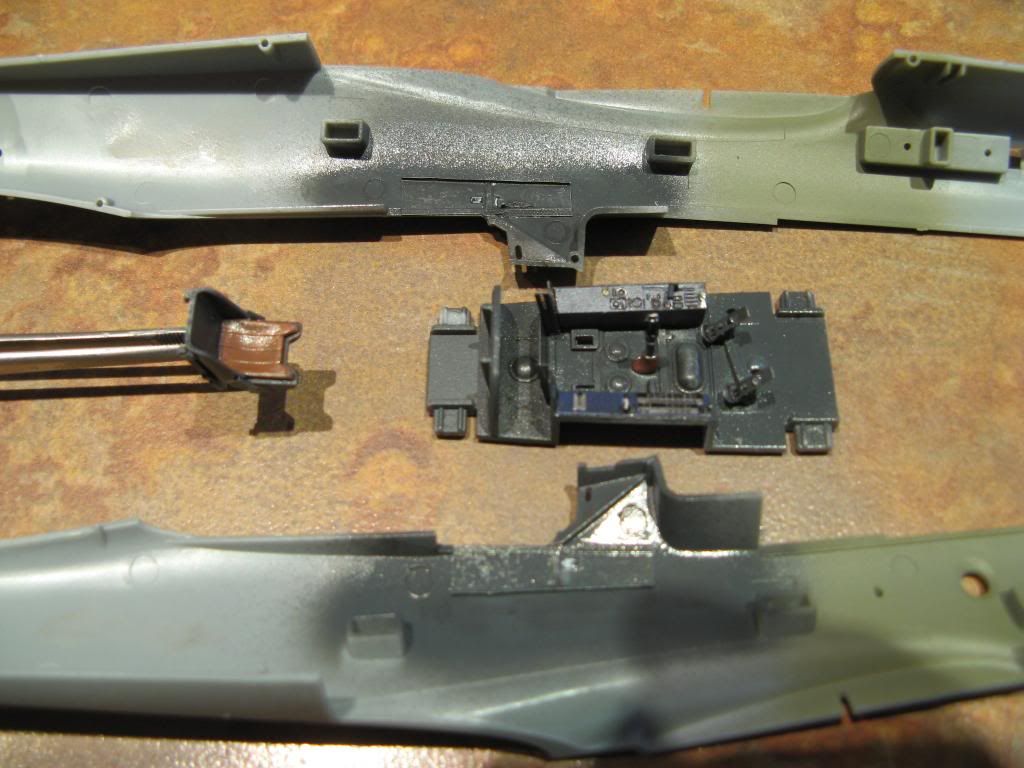
Another gloss coat and then the Eduard photoetch side panels were applied and the whole thing was given a wash with Lamp Black oil paint and Raw Umber for the leather on the seat. Applying the oil wash over the photoetched parts helps blend the colour in. The Eduard photoetch has a distinct blueish hue and the oils know that back a bit.
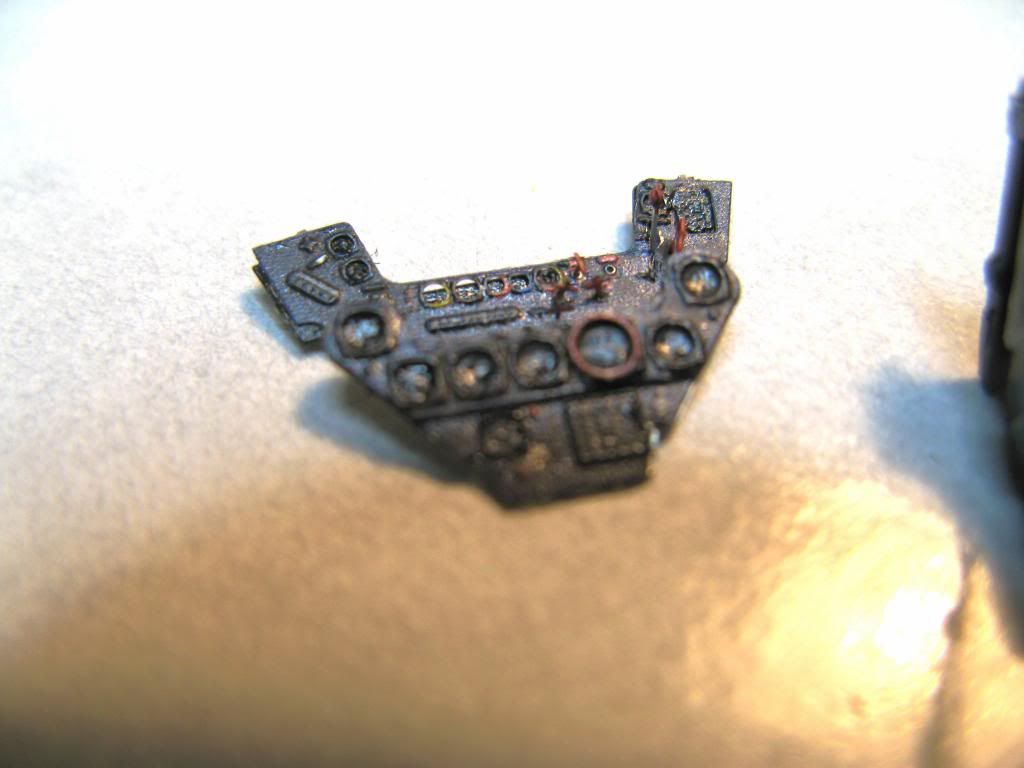
Assembling the instrument panel was fiddly. One of the tiny parts did fling off into space when I picked it up in the tweezers. It's hardly noticeable though...unless you notice it that is.
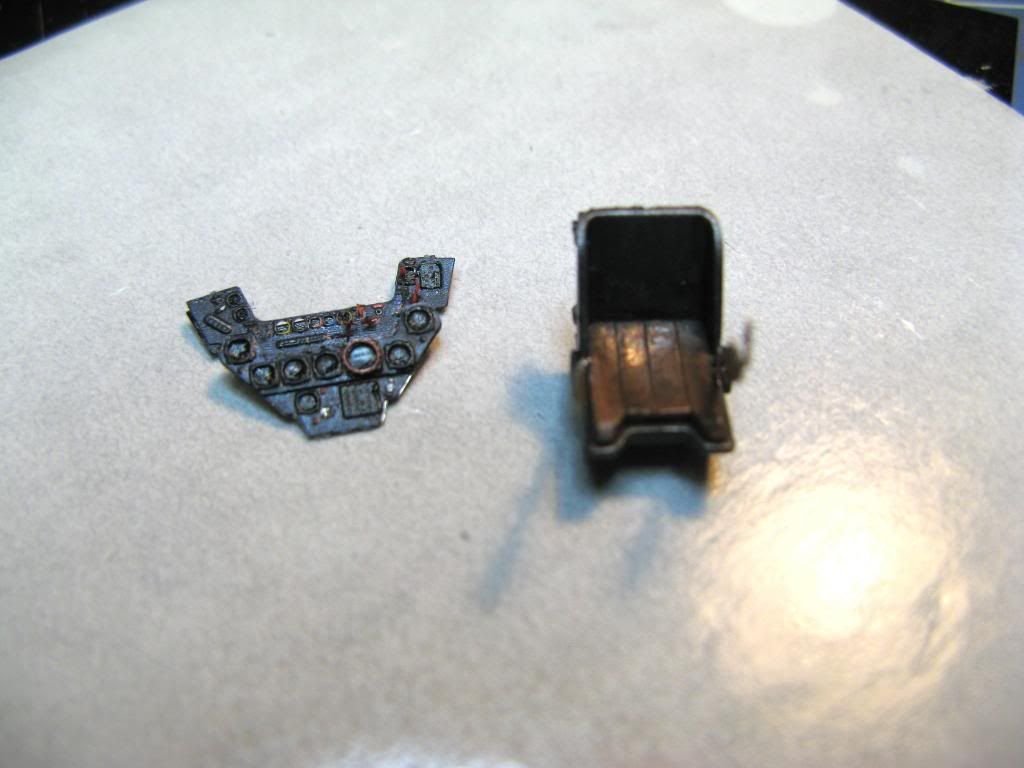
I also assembled the lap belts for the seat. I have not folded them onto the seat at this stage so the seat looks like its trying to grab a victim in some b-grade horror movie. "Leeetle 1/48 scale pilot you must sssit on me so I can eeeat you!"
The cockpit parts were given a coat of matt varnish and Crystal Clear was put into the instrument dials to simulate the glass. Finally the tub was installed into the fuselage.
Next time I'll work of the engine and the tail wheel and hopefully get the fuselage sides together.
On to part 3
Somewhere to Sit
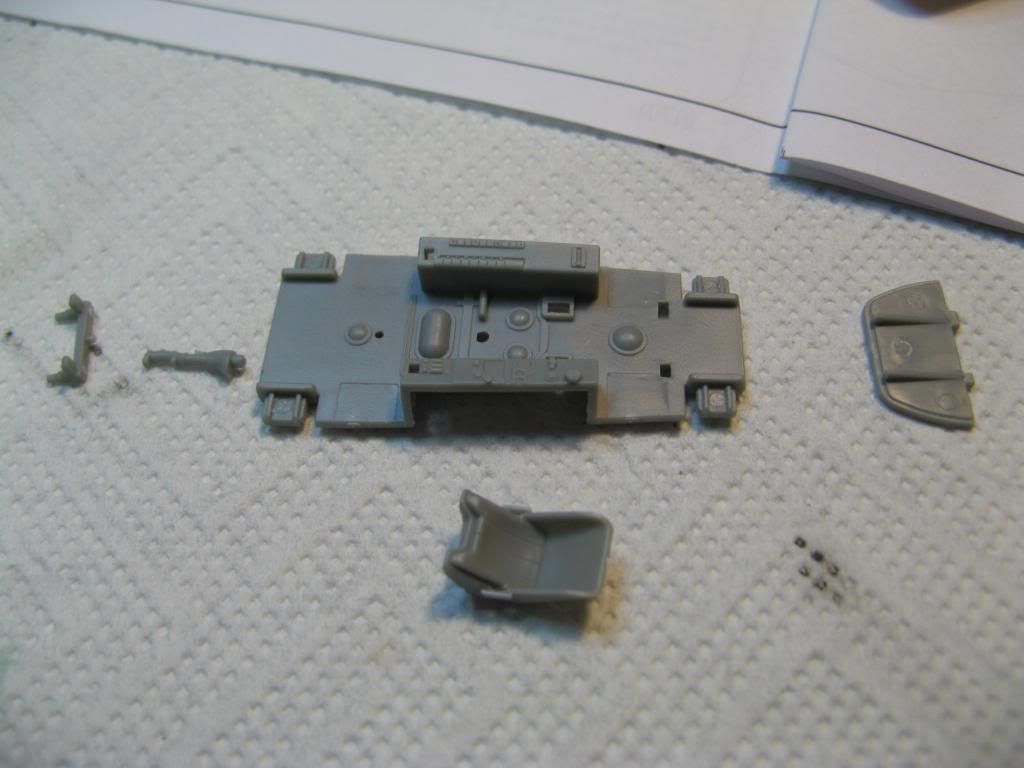
Like most model aircraft, construction starts with the cockpit. Since I'm using the Eduard detail set some of the plastic bits won't be used. I started by removing the bits that were going to be used from the sprue. These were test fitted into the fuselage before gluing selected pieces.The cockpit sidewalls are photoetch. These have a lip on them at the bottom which required careful folding. I don't know how I would have done this if I did not have the right tool for the job.
The rudder bar and the control column have been offset a bit. Since the kit has poseable control surfaces I'll place the ailerons and rudder to match. I'll have to remember to pose the tail wheel too or it might look a bit odd. Detail as been removed from the side consoles. This will be replaced with photoetch once the cockpit has been painted.
The photoetch rudder pedals from the kit were added to the rudder bar. I was going to use the Eduard replacements for this but one of them flew off into space as I cut it from the frame. I should have known better than to cut it unsecured. Of course after hunting around for it on the floor for about 20 minutes and then deciding to use the kit rudder pedals, I found it right next to the sprue it was cut from after I had done all the painting.
Looking at the layout of the cockpit it is apparent that Luftwaffe pilots had unfeasibly long legs in order to reach the rudder pedals.
The cockpit was given a coat of paint. Luftwaffe cockpits of this era were painted in RLM 66 Black-Grey. The closest colour I have to this is Vallejo 71.055. The cockpit was drybrushed in a lighter shade of grey and then in lightly Citadel Chainmail. Scratches were done with a prismacolor silver pencil. I also sprayed the engine bay and the area around the tail wheel. These were in Vallejo 71.044 which is a good match to RLM 02 grey.
The cockpit was given a gloss coat and a few placards were placed using the Airscale WW2 Luftwaffe Placards set.
Another gloss coat and then the Eduard photoetch side panels were applied and the whole thing was given a wash with Lamp Black oil paint and Raw Umber for the leather on the seat. Applying the oil wash over the photoetched parts helps blend the colour in. The Eduard photoetch has a distinct blueish hue and the oils know that back a bit.
Assembling the instrument panel was fiddly. One of the tiny parts did fling off into space when I picked it up in the tweezers. It's hardly noticeable though...unless you notice it that is.
I also assembled the lap belts for the seat. I have not folded them onto the seat at this stage so the seat looks like its trying to grab a victim in some b-grade horror movie. "Leeetle 1/48 scale pilot you must sssit on me so I can eeeat you!"
The cockpit parts were given a coat of matt varnish and Crystal Clear was put into the instrument dials to simulate the glass. Finally the tub was installed into the fuselage.
Next time I'll work of the engine and the tail wheel and hopefully get the fuselage sides together.
On to part 3
Saturday, 23 November 2013
Hobby Boss 1/48 Ta-152 C-0 - Part 1
Ok, so my mind is moving on to a new build. I'm still going to finish the Mig-29A (there's so many decals to place on it) but I thought I'd give you a taster for what's next. Unfortunately (for some), building these kits does not make the collection in my cupboard any smaller. While there's two being worked on, over the past couple of weeks I acquired another two to replace them. Well not really replace them...I just saw some other cool aircraft which I wanted.
I do wonder where I would display them if I built them all...there's 32 unbuilt planes hiding in my study cupboard at the moment. Sure, that's not many when compared to some collectors that I know, but I'm guessing that it's 32 more than most people have. My wife complains that they're dust traps but what would she know? I just think they're cool...in the same way that Dr Who made bow ties cool.
The Ta-152 is the ultimate variant of the Focke-Wulf FW-190, a fighter that saw action in great numbers during WWII. The Ta-152 was produced in small numbers over three main variants right at the end of the war. The Ta-152H was a high altitude interceptor, the Ta-152C was a medium altitude fighter and ground attack aircraft and the Ta-152E was a reconnaissance fighter. The Ta-152H has the somewhat redundant claim to fame as being one of the fastest piston engined fighters of the war. While other versions were in the early stages of production the Ta-152H is the only version of this fighter to have seen action.
I'll be building the Ta-152 C-0, a pre-production aircraft and one of three aircraft of that designation that were built. I'm doing this build as part of a Special Interest Group (SIG) build on a forum that I belong to.
The clear parts are beautifully clear with very little distortion.
The decals are well done and there's even a bit of photoetched brass for seat belts, aerials and the rear of the cockpit.
There are two marking options in the kit. One of these is for the pre-production/prototype machine CI+XM, and the other, "Green 13" from JG301 is fictitious. I'll be using the CI+XM markings.
It is an accepted fact that, with a few of exceptions, the Luftwaffe colours used on late war fighters are notoriously hard to have certainty over. Even if you know the RLM colours used, matching the shade is still open to interpretation. That said, I cannot help but think that the colour callouts in the instructions are not quite correct. Images of the actual aircraft show there is a demarkation of colours on the cowl just behind the radiator flaps and again halfway along gun cover just forward of the cockpit. The amount of contrast in these colours is not enough to suggest the two late war greens RLM 82 Light Green and RLM 83 Dark Green as shown in the colour callout of the kit. My references (see further down) suggest that the colours are RLM 75 Grey-Violet and RLM 83 Dark Green and I think they're probably correct. Interestingly kit does suggest these colours on the upper surfaces of the wings, however a well known image of the aircraft shows that the pattern Hobby Boss have suggested is close, but not quite correct. Especially on the left wing. I am also not sure that the unpainted aluminium area on the undersides extends so far back on the fuselage.
So, colours decided, there are a couple of issues with the kit itself which a true Luftwaffe Experten would not miss.
Firstly, the propeller blades are the wrong shape. They should have more of a paddle shape to them with a characteristic 'kink' on the leading and trailing edges. Similarly the spinner has a large hole in the tip commonly seen on Fw-190D and Ta-152 prototypes.
Instead the kit part has a much more gentle curve to the profile of the blades and the spinner tapers too much and has a small hole for the cannon barrel.
Secondly, the radiator used on the kit is not correct. For some reason Hobby Boss have used the radiator arrangement from a Fw-190 D-9 - an aircraft with a different engine.
The real aircraft had a very different radiator arrangement.
So, for a correct Ta-152 C-0 the entire radiator and propeller assembly has to be replaced. This leads us onto the extras I plan to add to this build.
Looking at the photograph though it appears that the spinner will still need some work or it too will need replacing. I do have the spinner from the Engines & Things Fw-190 D-11 conversion kit which I may use instead as it looks like it's the right shape.
To add some general improvements to the already good detail on the kit I'll also be using the Eduard detail set and some replacement wheels from True Details.
Both of these books contain quite a bit on the Ta-152C and, in particular, the specific aircraft I am building. The book by Thomas Hitchcock is a limited edition that has been signed by Willie Reschke, one of the pilots that flew the Ta-152. It cost me a packet at the time but I do like it.
The other reference book that will come in handy is Luftwaffe Camouflage and Markings 1933-1945 Vol. II. This book has two colour charts with colour chips that have been made to exactly the same recipe as the original paints. They give a very clear idea as to what the actual colours looked like. Unfortunately my photography is not up to making them look right in the image.
So, that's where we'll leave it at the moment. I still have a Mig-29A to finish so I won't really get too far into this kit until that one is finished.
I do wonder where I would display them if I built them all...there's 32 unbuilt planes hiding in my study cupboard at the moment. Sure, that's not many when compared to some collectors that I know, but I'm guessing that it's 32 more than most people have. My wife complains that they're dust traps but what would she know? I just think they're cool...in the same way that Dr Who made bow ties cool.
Introduction
The Ta-152 is the ultimate variant of the Focke-Wulf FW-190, a fighter that saw action in great numbers during WWII. The Ta-152 was produced in small numbers over three main variants right at the end of the war. The Ta-152H was a high altitude interceptor, the Ta-152C was a medium altitude fighter and ground attack aircraft and the Ta-152E was a reconnaissance fighter. The Ta-152H has the somewhat redundant claim to fame as being one of the fastest piston engined fighters of the war. While other versions were in the early stages of production the Ta-152H is the only version of this fighter to have seen action.
I'll be building the Ta-152 C-0, a pre-production aircraft and one of three aircraft of that designation that were built. I'm doing this build as part of a Special Interest Group (SIG) build on a forum that I belong to.
The Kit
The Hobby Boss 1/48 Ta-152 C-0 kit is a fairly recent release hitting the shelves of hobby shops in 2011. The main components of the kit are molded in light grey plastic with finely engraved panel lines.
A nice touch is having separate flaps and ailerons on the wing.
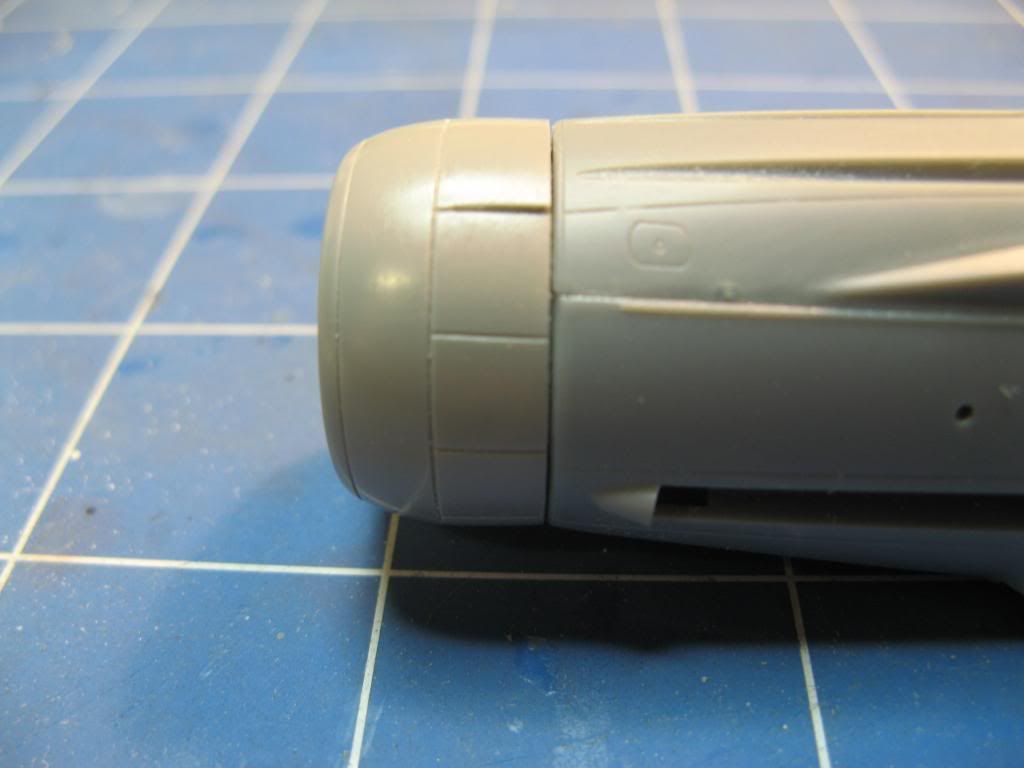
Detail extends to the rear part of the DB603E engine, which will be visible from the opened wheel well. Interestingly for some reason Hobby Boss chose to mold the exhausts in an upper and lower half. This might make them easier to hollow out. I did read in a review of this kit that you could use extra glue and have it squeeze out of the join to replicate the weld seam on the exhausts - maybe? The radiator is wrong btw.
There are two versions of the cowl. The one with the larger hump on it is for the C-1 production model which was going to have a DB603LA engine.
I don't like the look of that propeller but having a separate rudder is nice. The fabric effect is nicely subdued. The MK108 cannons look nice too. Unfortunately you won't see much of them as they're buried in the wing behind the main spar.
The clear parts are beautifully clear with very little distortion.
The decals are well done and there's even a bit of photoetched brass for seat belts, aerials and the rear of the cockpit.
There are two marking options in the kit. One of these is for the pre-production/prototype machine CI+XM, and the other, "Green 13" from JG301 is fictitious. I'll be using the CI+XM markings.
It is an accepted fact that, with a few of exceptions, the Luftwaffe colours used on late war fighters are notoriously hard to have certainty over. Even if you know the RLM colours used, matching the shade is still open to interpretation. That said, I cannot help but think that the colour callouts in the instructions are not quite correct. Images of the actual aircraft show there is a demarkation of colours on the cowl just behind the radiator flaps and again halfway along gun cover just forward of the cockpit. The amount of contrast in these colours is not enough to suggest the two late war greens RLM 82 Light Green and RLM 83 Dark Green as shown in the colour callout of the kit. My references (see further down) suggest that the colours are RLM 75 Grey-Violet and RLM 83 Dark Green and I think they're probably correct. Interestingly kit does suggest these colours on the upper surfaces of the wings, however a well known image of the aircraft shows that the pattern Hobby Boss have suggested is close, but not quite correct. Especially on the left wing. I am also not sure that the unpainted aluminium area on the undersides extends so far back on the fuselage.
So, colours decided, there are a couple of issues with the kit itself which a true Luftwaffe Experten would not miss.
Firstly, the propeller blades are the wrong shape. They should have more of a paddle shape to them with a characteristic 'kink' on the leading and trailing edges. Similarly the spinner has a large hole in the tip commonly seen on Fw-190D and Ta-152 prototypes.
Instead the kit part has a much more gentle curve to the profile of the blades and the spinner tapers too much and has a small hole for the cannon barrel.
Secondly, the radiator used on the kit is not correct. For some reason Hobby Boss have used the radiator arrangement from a Fw-190 D-9 - an aircraft with a different engine.
The real aircraft had a very different radiator arrangement.
So, for a correct Ta-152 C-0 the entire radiator and propeller assembly has to be replaced. This leads us onto the extras I plan to add to this build.
Aftermarket Extras
In order to correct the propeller and radiator I'm going to use the Quickboost cowl correction and propeller correction.Looking at the photograph though it appears that the spinner will still need some work or it too will need replacing. I do have the spinner from the Engines & Things Fw-190 D-11 conversion kit which I may use instead as it looks like it's the right shape.
To add some general improvements to the already good detail on the kit I'll also be using the Eduard detail set and some replacement wheels from True Details.
Reference Material
It's always good to have some reference material on hand when building an aircraft. I have quite a number of books on Luftwaffe aircraft some of which are pertinent to this build.Both of these books contain quite a bit on the Ta-152C and, in particular, the specific aircraft I am building. The book by Thomas Hitchcock is a limited edition that has been signed by Willie Reschke, one of the pilots that flew the Ta-152. It cost me a packet at the time but I do like it.
The other reference book that will come in handy is Luftwaffe Camouflage and Markings 1933-1945 Vol. II. This book has two colour charts with colour chips that have been made to exactly the same recipe as the original paints. They give a very clear idea as to what the actual colours looked like. Unfortunately my photography is not up to making them look right in the image.
So, that's where we'll leave it at the moment. I still have a Mig-29A to finish so I won't really get too far into this kit until that one is finished.
Subscribe to:
Posts (Atom)
